artists do not equal bakers.

I know my statement is broad, but it's true.

Artists are not good bakers. I, having a BA in Art, accept this fact freely and gladly.

I do not read instructions, I do not take time to measure out proportions, and I like to put a "little of this" and a "little of that" to taste just right. This doesn't work with baking, and that's why I'm not good at it.

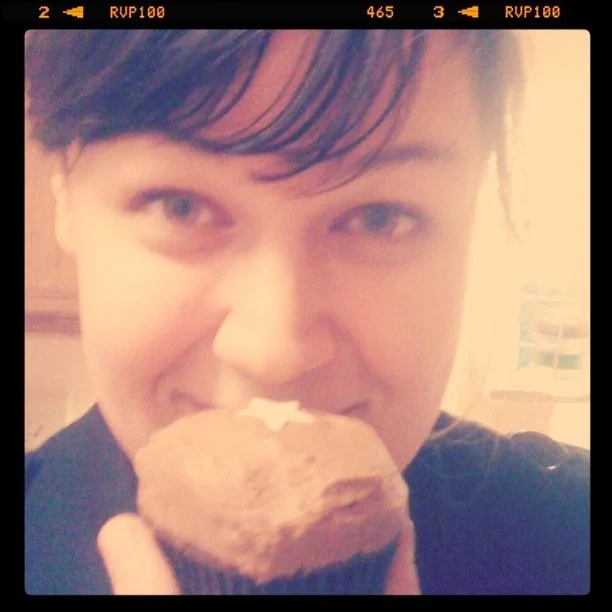
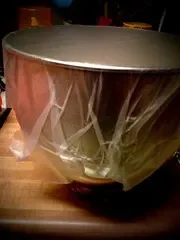
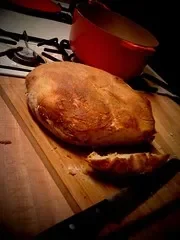
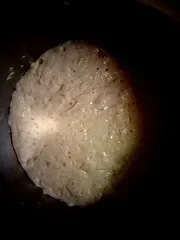
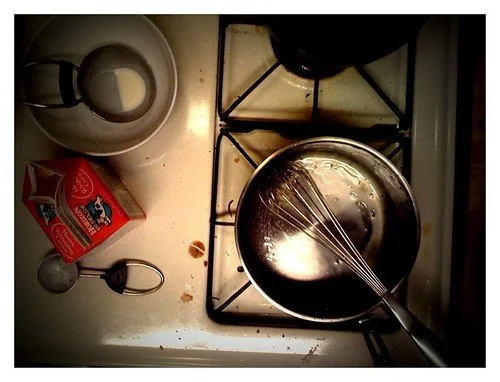
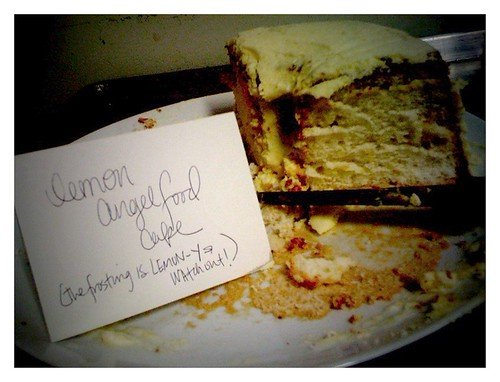
Sure, I can whip up brownies from a box but up until recently, I could NOT master chocolate chip cookies. Let me start from the beginning.

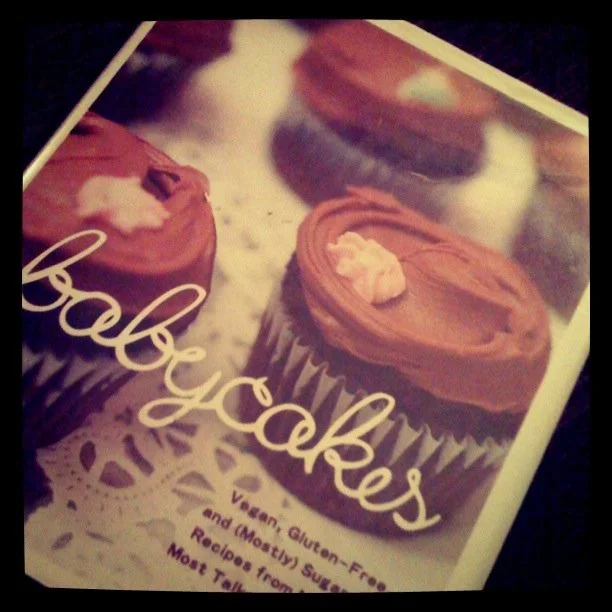
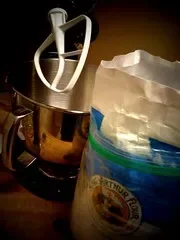
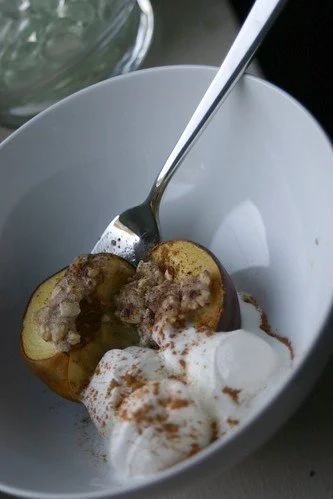
Why am I even baking, and if you've noticed I've updated what I'm currently reading, it's allergy-free (Babycakes cookbook by Erin McKenna). My lil friend Erikka has a gluten intolerance. She just discovered this fact last year, and it has changed her life! This is the girl I used to go through boxes of brownie mix and kraft mac & cheese with in college, and you are telling me she can't eat gluten!? When we were out at their house this fall, I got a little glimpse into her gluten-free world. It seemed yummy enough, but alas, not for me.

Then my friends Rachael & Steve started to look into the world of allergy-free baking & cooking for their kids, and started to tell me about the effects of preservatives, dyes, gluten, dairy,  you name it!

I started to wonder why I eat that stuff so carelessly - until I went to the doctor this month. I have been having some stomach stuff for the past 6+ months now. And the long and short of it is - I have a dairy intolerance. Wahhhhh my bottom lip is starting to quiver.

No more ice cream?
No more milk?
No more butter? 
No more glorious cheese board?!
No more BREYERS ROCKY ROAD?! I worked at an ice cream shop for 5 years...and you're telling me I can't touch that stuff without a stomach ache and then some in the horizon?

Ok: as I was leaving the doctor’s office I kept thinking maybe this doc is just trying to get me to go dairy-free because "I should...everyone should". I immediately pick up Andrew and drive to my favorite gelato joint. I am not going down without a fight. I eat gelato...3 different flavors. Then another great idea- let's get pizza. Cheese pizza. And give me a big old brownie while you're at it.

Fast forward two days later- I. Am. Miserable.

Okay...I get it, and I'm done. I stop eating dairy and it's like boom...I can sit throughout dinner without doubling over in pain from the party going on in my intestine. Welp.

UncategorizedComment
back in the saddle

i fell off the wagon this weekend.

well...i think the wagon pushed me.

I read an article the other day about how eating out and take out affect our lives and it got me thinking:

"For better or worse, we live in an age of multitasking, and being so busy means that many of us take shortcuts when it comes to food. According to the National Restaurant Association, nearly a third of adults say that take-out food is essential to the way they live. Not just helpful — essential."  -Article By: Amanda Genge

So why do I say the wagon pushed me? My wagon is my day to day life I think...life here for me is full of commuting, quick decisions & distractions and just plain busy. We are always going from this meeting to work to this lunch to running to the grocery store, and finally home; exhausted, hungry, and unwilling to leave the couch+netflix/magazine/iphone/computer(whatever is my newest distraction at home).Is this a city-dwellers problem, or just a plain old human kind problem? I think a little of both.Ok so I got my fill of DELICIOUS food that I didn't make this weekend...but here is what I did make last night. And I want to tell you now, O_M_G the old bay season is the secret trick ingredient.

Skillet Shrimp with Orzo

Weight Watchers Points+ 6 servings: 3 points

adapted from Martha Stewart

A few months ago I was walking down Michigan Ave with my sister, and Giada De Laurentiis was doing a demo in front of the Wrigley Building and was passing out boxes and boxes of orzo. Ever since then I have been trying to find ways to use it, and I think I found the perfect place for this pasta to play a leading role.

1 tbs olive oil1 tbs chili infused olive oil (if you don't want to buy it or use it...just use another tbs of regular olive oil)12 oz medium cooked/frozen shrimp1 tsp mustard seeds1 cup shredded carrots2 leeks, sliced into half-moons4 cloves of garlic sliced1/4 tsp old bay seasoning1/4 tsp red pepper flakes1 cup orzo1 1/2  cup chicken broth

1. In a 12-inch skillet, heat 1 tablespoon olive oil over medium heat. Toss shrimp with salt and pepper. Saute, tossing, until just cooked through, about 3 minutes. Remove.2. Add remaining tablespoon olive oil to pan; stir in mustard seeds. Cook until seeds begin to pop, about 30 seconds. Add leeks, carrots, and garlic. Cook, stirring often, until leeks are tender, about 5 minutes.3. Add red pepper flakes and old bay.4. Boil the chicken stock5. Stir in orzo, peas, and the boiling chicken stock; season with salt and pepper.6. Remove from heat. Cover; let stand 5 minutes.7. Add shrimp; stir gently.My lesson learned was two fold this week: I can make delicious food at home that is just as good as take out, but sometimes when I'm short on time...it's okay to cheat a little. To make eating out about soaking in time with friends or a breather to my busy day. For me to make take-out food helpful in my life... not essential.Also, check out my new and ever changing list of my favorite places to eat out in Chicago...refinedsugar.wordpress.com/chicago/

the art of eating in

"So the eating in is going well!"

*Blank Stare* or a well meaning "Oh, not you?!" is the reaction I get from most of my friends and coworkers who find that this foodie has taken a hiatus from my (sometimes almost) daily trips to Whole Foods, Butterfly, Sultans...I could go on.

Although I have to say it's been hard that most of our lunch conversation this week has been "Let's go around and share your favorite coffee shop in Chicago" or favorite bar, favorite thai, favorite burger joint...ah!!! Temptation!!

So yes, it's going well. I have officially lost 1.2 lbs so far (hey...it's something!) so the scale is being nice to me again. Phew.

The first 11 days of 2011 have brought us a few delicious recipes.

Carrot Ginger Soup

Fajita's

Orange Chicken

Roasted Vegetables with Maple Brussels Sprouts

and our favorite Pizza Recipe

I'm going to share the Carrot Ginger Soup recipe today, because I brought it to our staff potluck and it was a hit!

But not before I tell you about how important this week is.

If you didn't know, my husband is a Graduate Student at North Park Theological Seminary where he is pursuing his Masters in Christian Formation. Fancy, eh? He's graduating in May, so this week is what I like to call "the beginning of the end". We will be working for the Evangelical Covenant Church, and this is the week we start interviewing with the Superintendents of each conference in the country.

Our theme for this year is "No Expectations" (I don't know how many times I've said that to myself and others these past two weeks...lots!) so of course...we are not expecting to stay here in our beloved Chicago, or even the midwest (scary!!).

So if you make this soup, and while you're eating it and thinking about how great you think this blog is and the joy this soup brought into your life (hehe too much?) think of us, send us your good thoughts and prayers.

Also, my lovely husband got me an immersion blender. Yay. I think he was just sick of washing the blender and everywhere I dripped after making soup.

Carrot Ginger Soup

Weight Watchers Points+ 6 servings: 3 pointsadapted from Food Network & Maxine Bonneau

I swapped out heavy cream for evaporated milk to lighten up on the calories. Also, I love serving this dish with baked polenta cakes (the polenta in a tube just sliced and baked) and edemame.

2 tbs sweet cream butter (look for lite butter)1 large white or spanish onion peeled & rough chopped or 2 medium onions2 pounds carrots, peeled and sliced6 cups fat free/low sodium chicken or vegetable stock (if you want the recipe to be vegetarian)2 tbs grated ginger (or 1/4 tsp ground powder ginger)1 cup fat free evaporated milksalt and pepperSour CreamParsley for garnish

1. Heat butter in 6-quart pan (or I use my large Le Crueset french oven)2. Rough chop onions and add to butter (don't worry about chopping perfect...you're going to be pureeing this all in the end). I also like to throw about a teaspoon of salt on the onions to get them good and tasty.3. Peel your carrots and again, just roughly slice them into similar size pieces. Grate your ginger now too.4. When the onions have gotten limp or softened (I found with the spanish onion they just got soft and sweet and smelled like onion rings...yum) add the 6 cups of stock, sliced carrots, and the ginger. Stir together.5. Cover and bring to a boil.6. Lower the heat and simmer until the carrots are soft. Remove from heat.If you do not have an immersion blender, read 7. If you do own one, read 7.1 7. If you have a regular blender, carefully transfer soup to the blender only filling it up half way. Take the little cap out of the lid to vent and put a towel over the hole so you don't have an orange kitchen. Blend away my friend. Repeat in batches if necessary.7.1 If you have an immersion blender, CAREFULLY blend until soup is pureed and smooth. Try not to splash yourself with this molten hot concoction like I did. Ouchie.8. Add 1 cup evaporated milk so it's nice and creamy.9. Season with pepper if you'd like, and 2 tsp+ kosher salt.I really like to put a dab of sour cream in my bowl and pour the soup over, remember to add in the additional points.

back and better than ever!

it's 2011 it's 2011 it's 2011!!!!!!!!!!!! i want to scream it from the roof tops! this year has seemed so far off in my mind for so long, and it's finally here, and for some weird reason it feels so good.one of our new resolutions was to majorly cut back on our eating out expense. Hence, the restart of my food blog...with a twist. I am currently on the Weight Watchers program, so no more Julia Child butter fests or quarts of heavy cream. Hopefully I'll be able to post my recipes and my results.Now for the eating out bit: we haven't eaten out since December 30th, 2009 and it was at one of our favorite restaurants. Boy...we did ourselves in. Then of course we had to top the end of the year off with fried wings (they had buffalo wild wings sauce on them!!!), homemade french onion dip, and an assortment of cocktails and my favorite Chicago's own Goose Island Matilda....with fun friends and a nice round of Wits and Wagers before midnight. Ya. Total that all up to a nice 8 pound weight gain (don't forget to add in all the caramel, truffles, and toffee I made as gifts aka snacked on while making for Christmas).My experience so far this year (5 days in!) has consisted of Garlicky White Bean dip, Potato Leek soup, Mushroom Parmesian Crostini's, General Tso's chicken, and more. Tonight was Taco Wednesday, but unfortunatly Andrew had to work last minute, so the fiesta has just been for uno, me plus my Ina Garten cookbook I just picked up from the library.Tacos I made were pretty standard....hard shell, grassfed ground beef, topped with the food equivalent of GOLD (corn salsa from Trader Joes...run don't walk to one right now and purchase).But my new go to sweet treat is Black Bean Brownies. Now, I used a regular size cake pan, so they are really thick this time = more points+ used. But usually I use the biggest size pyrex I have and they are about 2-3 points+.Get ready here is the recipe. Lots of ingredients.

Dark Chocolate Black Bean Brownies

Weight Watchers Points+ in a 9x13 cake pan: 5 points

What you get is really nice cakey but still fudgey brownies with no fat or oil added. Try mixing in some espresso powder or a Starbucks Via for a flavor enhancer!

1 family size box Dark Chocolate Brownie Mix1 can black beans

1. Heat oven to 350 degrees.2. Puree black beans in a food processor until smooth (dump the whole can in there...do not drain!)3. Combine dry mix and beans in a kitchenaid or by hand until smooth.4. Spray pan with cooking spray (I used 9x13).5. Put mixture in pan.6. Bake for 35 minutes, checking at 30mins to see if they're done depending on your oven.

Chicago, food, Recipes Comment
quick post :: quick pie

I'm in a pinch to get this recipe out to you all, so this post is as fast as the time you need in the grocery store to buy all the ingredients! If you in a pinch to bring a quick dessert to a graduation party, memorial day celebration, or picnic this weekend like I was a few weeks ago, then this tasty summer treat is for you. I remembered I had promised to bring a dessert to a women's meeting I was attending so I started flipping through the pages of my new Cooking Light I had just gotten and voila! This colorful pie caught my eye. By the time you're done reading this post, you can hop in the car, head to the store and whip this easy pie up in a flash. Hurry!

Summer Raspberry Sorbet Chocolate Pie from May Cooking Light Magazine

Ingredients

1 chocolate cookie pie crust, ready made1 pint of raspberry sorbet1 small carton of raspberries1 container of coolwhip

Instructions

Let the pint of sorbet sit out until soften (mine was out for 30 minutes and was ready)Pour sorbet into pie crust and freeze 60-90 minutes until firmTop sorbet with container of coolwhip and top with RaspberriesFreeze 1-2 more hours (or until you have to go!) and you're done!Once my pie arrived at the meeting, we stuck it in the freezer for another 45 minutes. The last few pieces served fell apart, but noone minded because this tasty little treat is SO good whether it's in pie form or not!You can also try lemon sorbet with a gingerbread crust as well for a refreshing alternative!

Fro-YO!

Today is apparently the first day of summer here in Chicago. We were in Kansas City over the weekend, so we were thrilled to be getting back up north to cooler weather. Not so :)To celebrate summer finally showing up, we had turkey burgers and decided to make frozen yogurt. In my month long sabbatical from blogging, I made a delicious purchase of a Cuisinart ice cream maker.So far I've only made vanilla ice cream and watermelon sorbet. On deck is chocolate sorbet and chocolate fro yo.Today we went with plain frozen yogurt so we could top it with fruit, chocolate chips, anything!I have included the recipe for plain and vanilla.

Better-than-Berry-Chill Frozen Yogurtby Alicia Sturdy

Prep Time: 5 minutes+1 hour chill timeIngredients

3 cups plain yogurt (use whole yogurt or any kind of Greek yogurt like Fage 0% or 2%)2/3 cup sugar or agave(for vanilla: use one vanilla bean)

Instructions

Combine sugar and yogurt. Wisk until sugar is dissolved.Add vanilla if using. Wisk until combined.Refrigerate one hour to chillPrep ice cream maker and immediately pour chilled ingredients in spout while machine is running. Freeze according yo manufactures instructions.My machine is to churn 30 minutes and freeze two hours.Enjoy delicious healthy fro yo that doesn't cost a fortune!!

Recipes Comment
a knead for bread


Well I am almost finished up with The Art of Eating In and am almost over with a busy few weeks. I have been traveling so much, and our weeks have been jam packed. Andrew is almost done with school for this semester, and then he starts coming to work at my lovely place of employment.

I was really intrigued by this No-Knead bread recipe, especially since I don't have a bread machine, and we have been spending so much money on a loaf of french bread here and there. I decided to try to give it a crack.

It's very simple.

Step 1: Mix and Rest

Mix the ingredients and let it sit 12-18 hours. Leaving the bread for the evening. Good night! It looks like this when it's ready to go!

Step 2: Shape and Rise

Flour a work surface, and fold the dough over itself a few times. Place on a floured cotton towel (not terry cloth) and place another cotton towel over it. Let rise for 2 hours or until it's bigger.

Step 3: Bake

Place into a cast-iron pot or Pyrex pan and bake at 450°F for 25 minutes. And VOILA — tasty, crispy, soft-on-the-inside bread.

No Knead Bread Recipe

Ingredients

  • 3 cups flour (I used bread flour)

  • 1/4 tsp dry active yeast

  • 1 1/4 tsp salt

  • 1 5/8 cup of water (2 tbs = 1/8 cup, so 10 tbs + 1 cup water)

Instructions

  1. Mix the ingredients until well blended.
    Let sit 12-18 hours covered in the bowl with plastic wrap.
    The dough will be ready when little bubbles form on the top.

  2. Flour your work surface and fold the bread over itself (basically after I got it out of the bowl, I just folded the ball in half... you can be fancy and fold both ends in on each other in a “tri-fold” type way).

  3. Flour (more generously than before, but don’t overdo it) a cotton towel and place the bread with the “seam” side down (where the fold is — you’ll be able to tell there will be a defined line) on the floured towel.
    Cover with another cotton towel and let rise 2 hours. You should be able to poke it and it not bounce back very quickly when it's ready.

  4. In the meantime, heat the oven to 450°F.
    Place your cast-iron pot into the oven to warm it up as the oven heats.

  5. When the dough is ready, place your hand under the towel and carefully plop the dough seam-side up into the pot.
    It will be messy with the flour everywhere, but that’s okay. Shake the pot back and forth to even out the bread if needed.

  6. Place the cover on the pot and bake for 35-40 minutes, then take the cover off and bake for an additional 10-15 minutes, or until the crust is golden.

  7. Cool on a wire rack and enjoy!

Hopefully I will be making a couple more variations of this bread as my creativity and ingredients allow!
I’m looking to do a cinnamon bread next — my favorite!


Spring is here!

This is a pretty early morning post for me. But I can't help but want to write about my great day yesterday. Andrew and I have been through a very busy past 6 months, culminating with a bunch of really intense past couple of weeks. With summer closing in on my calendar, I feel the need for all the spring time essentials including spring cleaning.Yesterday I took a personal day to clean out my soul and our kitchen. We had dishes from many meals ago ghat had been ignored so it was time to tackle that.To close my day I had dinner with Baking Baileys in an effort to clean out both of our fridges since we will be evacuating Chicago to celebrate Easter.I found this BBQ recipe to go along with out sweet potato fries to try to pull together our random dinner. I am not one of those die hard "just the right taste" BBQ sauce people, so this was my first attempt At making a condiment that on the contrary my husband is obsessed with.I'm sure if you wanted more kick than Zing, you could add some Hot sauce to it. Again I'm not a BBQ connoisseur so please feel free to suggest some tasty additions!

Balsamic BBQ Sauce by Giada De Laurentiis from the book Giada's Kitchen

Ingredients

  • 1 cup balsamic vinegar

  • 3/4 cup ketchup

  • 1/3 cup brown sugar

  • 1 garlic clove, minced

  • 1 tablespoon Worcestershire sauce

  • 1 tablespoon Dijon mustard

  • 1/2 teaspoon salt

  • 1/2 teaspoon freshly ground black pepper

  • 4 chicken breasts, grilled and seasoned with salt and pepper

Combine all the ingredients in a small saucepan and stir until all the ingredients are incorporated and the mixture is smooth. Simmer over medium heat until reduced by 1/3, about 15 to 20 minutes.Lightly coat the chicken with some of the BBQ sauce using a pastry brush while still on the grill or in the pan. Place the remaining BBQ sauce, still in the small saucepan, over low heat or on the edge of a gas or charcoal grill and allow to gently simmer while the meat cooks.

real simple

ok friends, sorry I have been absent for so long. We have been busy busy busy and along with that, cooking MANY dinners from so many great recipes I have been storing up to blog about.We have been watching a lot of Hulu and making trips to the library in our little free time. More specifically, we have been watching a lot of "food tv". Kitchen Nightmares, Jamie Olivers Food Revolution, I'm reading a slurry of cookbooks from the library, and just recently convinced Andrew to let me purchase my "must have book of 2010."I am reading this new book, "The Art of Eating In"...not sure if it's new to the world, but it's new to me. Oh my lord, Cathy Erway: you are my kindred spirit. I chuckle, I gasp, I nod along as I read your book. I feel like we are friends, having a conversation about your new venture. But every page I pass, I am affirmed in my convictions that while eating out is a treat in so many ways...cooking brings me so much more joy than having someone serve me. My mind has been afire with thoughts of where my food comes from, who made it, whats in it, how does it get to be what it is...and they weave there way in and out and inbetween my daily doings as I think and prepare for that evenings meal. My hands are quickly chopping the onions. I'm cooking the meat with the precise amounts of spices, salt, butter, fat...so I know what is going in to the food and on to my plate. I feel inspired by Cathy...so be prepared to hear my rambles of questions & thoughts as I dig more into her book and blog.That's how I got at this recipe. The ingredients aren't special, I didn't buy them at a food emporium or a specialty shop. This recipe just simply holds memories for me. The taste brings me back to the times I've prepared it...usually for my husband. Times we've shared it with others come back to my mind, and it reminds me that good food doesn't need to be made of a million little specialty ingredients, machines, techniques. Well...not all of the time.Andrew requested this dish the other day when I asked him what he'd like for dinner. After picking up my new Le Cruseut french oven (!!) (another great craigslist find), we headed to the store to pick up what was needed. I think the one thing I love about this beef stroganoff compared to others, is that the vegetables stay kind of crunchy after cooking them, so it's almost refreshing.Also, this dish can be doubled easily for entertaining, and doesn't need much "tending to" so you can cook it easily and serve quickly!

Beef Stroganoff by Real Simple's Kate Merker, December 2006Serves 4

Ingredients

  • 1 12-ounce package egg noodles

  • 1 tablespoon olive oil

  • 1 small yellow onion, thinly sliced

  • 1/2 teaspoon kosher salt

  • 1 4- to 4.5-ounce can or jar sliced mushrooms, drained **if you substitute fresh, it will have more crunch and texture.

  • 1 green bell pepper, thinly sliced (optional) **do not make this optional..it makes the dish so unique and tasty!

  • 2 10-ounce packages fully cooked beef strips **if you are in a pinch..sure-go for this...I bought beef and cooked it in 1 tbs butter and it is much less chewy than this packaged beef. Plus...you made it!

  • 1 8-ounce container light sour cream

  • 2 1/2 tablespoons steak sauce

  1. If using raw meat, slice thinly (or purchase "stroganoff beef") and slice into thin strips. Melt 1 tbs butter in a pan, and cook meet accordingly...about 2 minutes per side depending on the thickness of the cut (mine were pretty thin, so it didn't take much time).

  2. Cook the noodles according to the package directions. Meanwhile, in a large saucepan, over medium heat, heat the oil. Add the onion and salt and cook for 5 minutes. Add the mushrooms and bell pepper (if using) and cook for 5 minutes. Add the beef and cook until warmed through, about 8 minutes.

  3. In a small bowl, combine the sour cream and steak sauce and stir the mixture into the beef and mushrooms. Divide the drained noodles among individual plates and top with the stroganoff

my favorite treat from the market...Mexican Cola...yummmm.

bippity boppity bacon

So after a long weekend of tramping around town with mom+little sis, 1 chicago style hotdog, a trip to Rosebud (where I got the inspiration for this recipe), the Art Institute and many delicious breakfasts later: I'm back, Wustof in hand, Canon Rebel back in biz to document my fun. I do have to admit though, I love the iPhone pictures, but we'll see how this goes.As I said before, my mom and sister where in town this past weekend for their spring break. On Saturday night, we went from restaurant to restaurant, trying to get a quick table for dinner sans reservations. Finally after walking in circles around River North, we ended up at the doorstep of Rosebud. After shopping and going to museums all afternoon, we were ready for a meal: and boy did we get a treat! I ordered the Fettuccine Boscaiola, which is Mushrooms, Spinach, Garlic in a White Sauce with Toasted Breadcrumbs and White Truffle Oil.  Each bite was divine.  The mushrooms where cooked perfectly to my taste (I like a little bit of cooked crunch...nothing limp when it comes to mushrooms, that's boring!), and the breadcrumbs where a perfect surprise on top. We also had a traditional Spaghetti, and topped our meal off with a giant slice of the Canolli cake. We waddled our way back to the hotel room, and promised that this would be our new dinner place in town.So since I was so inspired, I can't seem to get away from Martha lately, I had to try this. Plus my favorite part is I had all these things in my pantry which makes it all the better. This dish is a carbonara like pasta, quick, easy, ready in 25 minutes.  I opted for turkey bacon instead of pancetta: although next time I may use a high quality bacon. Turkey bacon doesn't give you those delicious crumblies...it was more like bacon chips. I also used about a 1/2 tbs of black truffle oil to give it a little bit of a flourishing aroma and taste.

Fresh Linguine Pasta with Bacon and Peas by Martha Stewart

Ingredients

Serves 4 to 6

  • Coarse salt and ground pepper

  • 4 slices turkey bacon, sliced crosswise into 1/2-inch pieces

  • 2 shallots, halved and thinly sliced OR 1 medium onion+2cloves minced garlic

  • 1 box (10 ounces) frozen peas, thawed

  • 1/3 cup heavy whipping cream or half and half

  • 2/3 cup chicken broth

  • 18 ounces fresh linguine pasta or any type of fresh cut pasta

Directions

  1. Set a large pot of salted water to boil. In a large skillet, cook bacon over medium until crisp, 5 to 7 minutes. With a slotted spoon, transfer to a paper-towel-lined plate to drain (leave fat in skillet).

  2. Add shallots/onions+garlic to skillet; season with salt and pepper. Cook over medium, stirring occasionally, until they begin to soften, 1 to 2 minutes.

  3. Reserve 2/3 cup of pasta water to make chicken broth (if using a boullion cube**).

  4. Add peas, chicken broth and whipping cream; season with salt and pepper. Simmer until slightly thickened, about 2 minutes.

  5. While simmering, drizzle oil over mixture. Toss while continuing to simmer.

  6. Cook pasta in boiling water until al dente, according to package instructions. Reserve 2/3 cup pasta water**; drain pasta, and return to pot. Pour sauce over pasta; toss to combine. Sprinkle with bacon, and serve

**I used a bullion cube instead of canned/boxed chicken broth because that's what I had in my cupboard. I made the broth using the water from the pasta so it was more starchy and able to thicken a little better with the peas and onions.  If you don't use a bouillon cube, just reserve 1/4 cup of the pasta water and slowly add while tossing with sauce.

lemony goodness
 

Since we got a KitchenAid for Christmas this year (Thanks Auntie Teri!!) I have been way more motivated to bake. The work is already done for me when whipping egg whites, making frosting, and especially when making the angel food cake batter and frosting for this recipe.I get the Martha Stewart Everyday Food emails well...everyday. And yesterday as I was cruising the website I noticed Martha had a whole feature on lemons.I came across an angel food cake recipe that looked so beautiful and delicious in the picture. I love angel food cake: it's light, fluffy, melts in your mouth. Tasty. Of course I've only ever made the boxed ones, so here was my hand at trying to make my first angel food cake.Now, let me tell you about my angel food adventure. Martha says..." Transfer batter to a 10-inch angel food cake pan with legs."Translation in my mind: Isn't a tube pan a less fancy bundt pan?So I begin my adventure after work to find a cheap tube pan. Surely any thrift store in the Chicagoland area with a pretty wide variety of kitchenware should have at least ONE.I went to 3 different thrift stores. Of course everyone has a plethora of bundt pans to donate to the Salvation Army...probably because they once tried to make an angelfood cake that stuck to it and thought "What is the point of owning this."After 90 minutes of driving to my favorite thrift stores: nada. I finally drag myself to Target before Andrew needs the car to go to a meeting: they have ONE tube pan. PRAISE the Lord.Whats the point of jabbering on about bundt pans vs. tube variety?The cake will simply not come out of your fancy schmanzy bundt pan.Oh, and the cake was a tasty snack today at work!Also in other news, my new memory card came! My C. Rebel is back in business!Onward to the recipe!

Lemony Angel Food Cake recipe by Martha Stewart

Ingredients

Makes one 10-inch cake; Serves 10 to 12for the cake

  • 1 cup sifted cake flour (not self-rising)

  • 1 1/2 cups sugar

  • 12 large egg whites

  • 2 tablespoons finely grated lemon zest

  • 1 tablespoon plus 1 teaspoon fresh lemon juice

  • 1 teaspoon cream of tartar

  • 1 teaspoon pure vanilla extract

  • 1/4 teaspoon salt

for the lemon cream 'frosting'

  • 1/2 cup fresh lemon juice (if you don't want it really lemony, you could use refrigerated lemons since their taste isn't as forceful as freshly squeezed..but don't you want fresh!?)

  • 1/2 cup sugar

  • 1 tablespoon cake flour (not self-rising)

  • 1/4 teaspoon salt

  • 1 1/2 cups heavy cream, chilled

  • 1 tablespoon finely grated lemon zest

Directions

  1. Make the cake: Preheat oven to 325 degrees, with rack in lower third of oven. Sift flour and 1/2 cup sugar into a bowl.

  2. Whisk whites with a mixer on medium speed until frothy, about 1 minute. Add lemon zest and juice, cream of tartar, vanilla, and salt; continue whisking until soft peaks form, about 2 1/2 minutes. With mixer running, gradually add remaining cup sugar.

  3. Increase speed to medium-high; continue whisking until firm, not stiff, peaks form, about 2 minutes. Sprinkle whites with 1/3 of the flour-sugar mixture. Using a rubber spatula, gently fold to combine. Sprinkle remaining flour-sugar mixture over whites in 2 additions; gently fold to combine.

  4. Transfer batter to a 10-inch angel food cake pan with legs. Gently run a knife through the center of the batter to remove any air bubbles. Bake until a tester inserted into center comes out clean, 45 to 50 minutes.

  5. Remove pan from oven, and invert onto its cooling legs (if your tube pan doesn't have legs, invert it over the neck of a wine, or similarly shaped, bottle to cool)**; let cool, 1 1/2 to 2 hours. Run a knife around the inner and outer edges of cake to remove. Invert onto a serving platter. (Use a knife to separate cake from bottom of pan.) Let cool on a wire rack. Unfrosted cake can be stored in an airtight container for up to 2 days.

  6. Make the lemon cream: Prepare an ice-water bath. Whisk lemon juice, sugar, flour, and salt in a small saucepan over medium-high heat. Bring to a boil; whisk constantly for 1 minute, until it thickens. Transfer to a heatproof bowl set in ice-water bath to cool completely, stirring occasionally. Meanwhile, whisk cream and lemon zest with a mixer on medium speed until medium peaks form, about 3 minutes. Gently fold whipped cream into juice mixture in thirds. Refrigerate lemon cream, up to overnight.

**Turning the cake upside-down on a bottle of wine, or on it's legs is important: don't skip this. If the pan is resting right-side-up, gravity will do it's work and collapse the cake on top of itself.Don't worry: like I said before, the cake will not fall out of the pan if you have done everything right. Gravity will work in the right direction to keep the cake tall when resting on the bottle...just pop the middle hole through the bottleneck.

 
back in action!

After a 7 month sabbatical: I'm back and trying to kick-start my food blog. So hello all you out there: whether you care what I cook or not....welcome to my world.My world consists of a 15'x6' hallway more commonly referred to as my kitchen. And although it is possibly the worst looking room in my house off the bat, it is transformed each day into an eatery, my own little haven.Monday as I scoured for a recipe to ale to my sick husband, I found this Bon Appetit recipe from 1994 for Chicken & Vegetable Stew. After a short excursion to the doctors office, to Walgreen's, to Whole Foods and back: I began my first experience roasting root vegetables.Here is my revised, and hopefully lighter version of the Bon Appetit Chicken Stew with a little side of crisped french bread.

Chicken and Roast Root Veg Soup with Crispy Bread

4 tablespoons vegetables oil, divided3 Boneless Skinless Chicken Breasts3 tablespoons butter4 parsnips, peeled, sliced1 small turnip, peeled and cubed3 large carrots, peeled, thinly sliced3 medium leeks (white and pale green parts only), halved lengthwise, sliced1 pound baby new potatoes, each cut in half4 tablespoons all purpose flour8 cups reduced sodium chicken broth1 tablespoon dried rosemary1 tablespoon dried thyme1 bay leaf1/4 cup 2% milk + 2 tbs butter

Preparation

Pre-heat oven to 450F.  Combine leeks, turnips, carrots, parsnips and potatoes into a roasting pan (if you don't have one, I used a casserole dish).  Top with salt and pepper, and drizzle with 2 tbs olive oil. Toss to coat thoroughly.Roast until vegetables are just tender and slightly browned, about 35 minutes.Heat vegetable oil in heavy large Dutch oven over medium heat. Sprinkle chicken pieces with salt and pepper. Add chicken to pot in batches and cook until light brown, about 5 minutes per side. Using tongs, transfer chicken pieces to cutting board.  Slice and chop chicken into bite size pieces and add back to pot. Pour off fat from pot and discard.Add butter to same pot and melt over medium heat. Add roasted vegetables to pot. Cook 4 minutes, stirring occasionally. Add flour and stir 2 minutes. Gradually mix in chicken broth. Increase heat and bring to boil. Return chicken to same pot. Add 1 tablespoon tarragon and bay leaf. Reduce heat, cover and simmer until chicken and vegetables are cooked through, turning chicken occasionally, about 30 minutes.Add milk and butter to pot; increase heat and simmer until liquids thicken, about 10 minutes.  Discard bay leaf. Mix in remaining 1 tablespoon tarragon. Season stew to taste with salt and pepper, top with freshly chopped parsley.

Crispy Bread

1 loaf french bread, sliced thinly on a bias1/2 tbs freshly grated parmesan cheesePre-Heat oven to 450 (should already be at this temp from roasting the vegetables)Thinly slice the french bread and place each piece on a baking sheet. Season to taste with koshar or sea salt, and top each slice with microplaned cheese.Bake for 5-10 minutes or until edges start to brown.

millions of peaches, peaches for me
 

I have a new fruit obsession: peaches!

I used to despise them. My sister was always eating them growing up — the dripping, the stickiness, the smell, the weird fuzz on the outside. Why would I want that when I could have a fruit I already knew was delicious and safe (like APPLES)? And less drippy.

Last week, I was at my new favorite market, City Fresh, and the first thing that caught my eye was a mound of beautiful, plump peaches. I had to try a few. I bought two, thinking I could pawn them off at work if I didn’t like them.

Then it happened — I bit into the crispy, not-so-juicy (and still a little fuzzy) fruit I’d always hated. I was hooked.

This past Sunday, as I did my shopping, I bought three pounds at 49¢ a pound. It was too good to be true for my new addiction!

While reading through Bon Appétit this week, I realized the wonderful new cooking opportunities this opened. Fortunately, the August issue had a whole section of peach recipes, and one that caught my eye was Roasted Peaches with Amaretti Crumble.

My husband is allergic to coconut, so macaroons were out. I tweaked it to make an almond crumble instead — and it was a hit with our neighbors who came over for dessert!

Well, here’s to my first post. Bon Appétit!

Roasted Peaches with Almond Crumble 🍨

Recipe by: — adapted from Bon Appétit, August 2009

Ingredients

  • 5 amaretti cookies (Italian macaroons; about ¾ oz total)
  • (I used double the almonds instead)
  • 3 tablespoons whole natural almonds
  • 2 tablespoons unbleached all-purpose flour
  • 1½ tablespoons sugar
  • 3 tablespoons chilled unsalted butter, cut into ½-inch cubes
  • 3 firm but ripe large peaches, rinsed, wiped clean of fuzz, halved, and pitted
  • Vanilla ice cream, for serving

Preparation

  1. Preheat oven to 350°F. Butter an 11x7x2-inch glass baking dish.
  2. Combine cookies, almonds, flour, and sugar in a food processor. Using on/off turns, process until the cookies and almonds are coarsely chopped.
  3. Add the chilled butter and pulse until the mixture forms moist clumps.
  4. Place peach halves, cut side up, in the prepared dish. Spread topping over the surface of each peach half (about 1 generous tablespoon each), pressing lightly to adhere and leaving a ¼-inch plain border.
  5. Bake until the peaches are tender when pierced with a knife and the topping is golden brown — about 35 minutes.
  6. Cool slightly. Transfer one warm roasted peach half to each of six plates and serve with a scoop of vanilla ice cream alongside.
 
Hello World!

Well, hello.
Let me introduce myself. My name is Alicia, and I'm addicted to cooking. I live in Chicago with my husband in our small one-bedroom apartment near North Park University, where he’s studying for his Master's in Christian Formation.

Like all good seminary wives, I work full-time to support my husband’s grad school stint and come home to perform wife-ly duties for the remaining four hours of the day after work and commuting. The wifely duties aren’t as bad as they may seem — cleaning, doing laundry, making the bed, reorganizing our small library of books that live under our coffee table, and so on.

But the one duty I love the most: the grocery store.

I’m one of the few people who can say I enjoy grocery shopping. I’ve even, on occasion, happily offered to shop for friends, family, and coworkers. They think I’m nuts.

The grocery store, on any given night, could mean many things to the average shopper — long lines, bad produce, overpriced items, packed parking lots, etc. But not to me. The grocery store, to me, is therapy. Don’t ask me why. I could go every night if I could.

This leads to the cooking aspect. Ever since I started cooking for myself in college, I’ve been an addict. I love to look at a recipe, head to the store (obviously), and pick up the goods.

This is where my blog comes in. With all this experimenting and tasting, why not document it? Hopefully, you enjoy my recipes, my bravery to try new things, and join me on the journey!

Uncategorized Comments