Posts in Recipes
My favorite S'more Cupcake
 

I have a secret. Well, I'm sorry to say it might not be that big of a secret, but...here it is. I'm obsessed with S'mores. I don't know the exact date of my infatuation, since let's face it, s'mores is an American institution. And really if I'm being honest, the ingredient at the heart of my obsession is the humble marshmallow. Through the years, as I have sought out s'mores (i.e. marshmallow) in different forms to quench my obsession....in cakes, ice cream, frappachinos, and even my favorite Martian Mallow Lipsmacker circa 1998 (which also inspired a sundae I invented at the ice cream shop I worked at in high school...different story for a different day) I came upon my favorite form of the s'more (besides the traditional form of them)...the s'more cupcake.

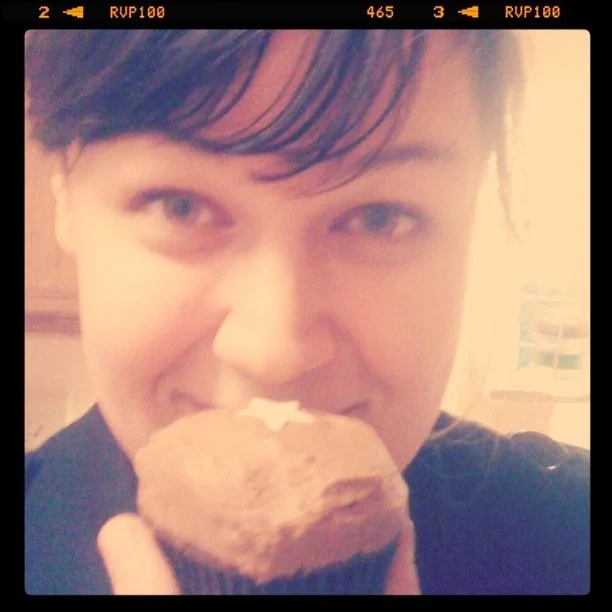
It was a cold January afternoon in Chicago when I strolled into Sprinkles to get a quick afternoon bite with my mom. Typically I get the Vanilla Chocolate cupcake, but that day in the case, the blistered meringue marshmallow topper beckoned me. 

One bite and I was a goner. Instead of going into detail, I beg you to experience for yourself. You can go to Sprinkles in August (it's the cupcake of the month) -or- you can whip it up for your 4th of July celebrations this week. 


alicia's S'more cupcake

ingredients

for crust

  • 1 1/2 cups graham cracker crumbs (from about 20 squares)
  • 1/3 cup unsalted butter, melted
  • 1/4 cup sugar
  • 1-10oz bag Ghirardelli Chocolate Premium Baking Chips 60% Cacao Bittersweet Chocolate (or just 9oz any bittersweet chocolate, chopped)

for cake

for frosting

  • 8 large egg whites
  • 2 cups sugar
  • 1/2 teaspoon cream of tartar
  • 2 teaspoons pure vanilla extract

steps


Cupcakes

  1. Preheat oven to 350 degrees and line 2 cupcake tins (24 cupcake liners)
  2. In a large bowl, place graham cracker crumbs, sugar, and melted butter...stir until combined.
  3. Place 1-2 tablespoons (your preference on how thick you want it) graham cracker mixture into the bottom of each prepared muffin cup. Press crumbles to form crust. 
  4. Place 2 tsp of chocolate chips in each muffin cup. Place pans in oven for about 5 minutes until the edges of the 'crust' is golden.
  5. Remove from oven and fill each cup three-quarters full with cake batter. Sprinkle each with remaining chocolate chips.
  6. Return to oven and bake 8-10 minutes...rotate pans and bake for another 8-10 minutes until toothpick inserted in cupcake comes out clean.
  7. Cool cupcakes in tin on a wire rack for 10 minutes, then remove.

Marshmallow Frosting

  1. Place egg whites, sugar, and cream of tarter in a glass bowl over a saucepan of boiling water.
  2. Whisk constantly until sugar is dissolved and whites are warm to the touch, 3 to 4 minutes.
  3. Transfer bowl to electric mixer fitted with the whisk attachment, and beat, starting on low speed, gradually increasing to high, until stiff, glossy peaks form, 5 to 7 minutes.
  4. Add vanilla and fold over a few times to combine.

To finish...

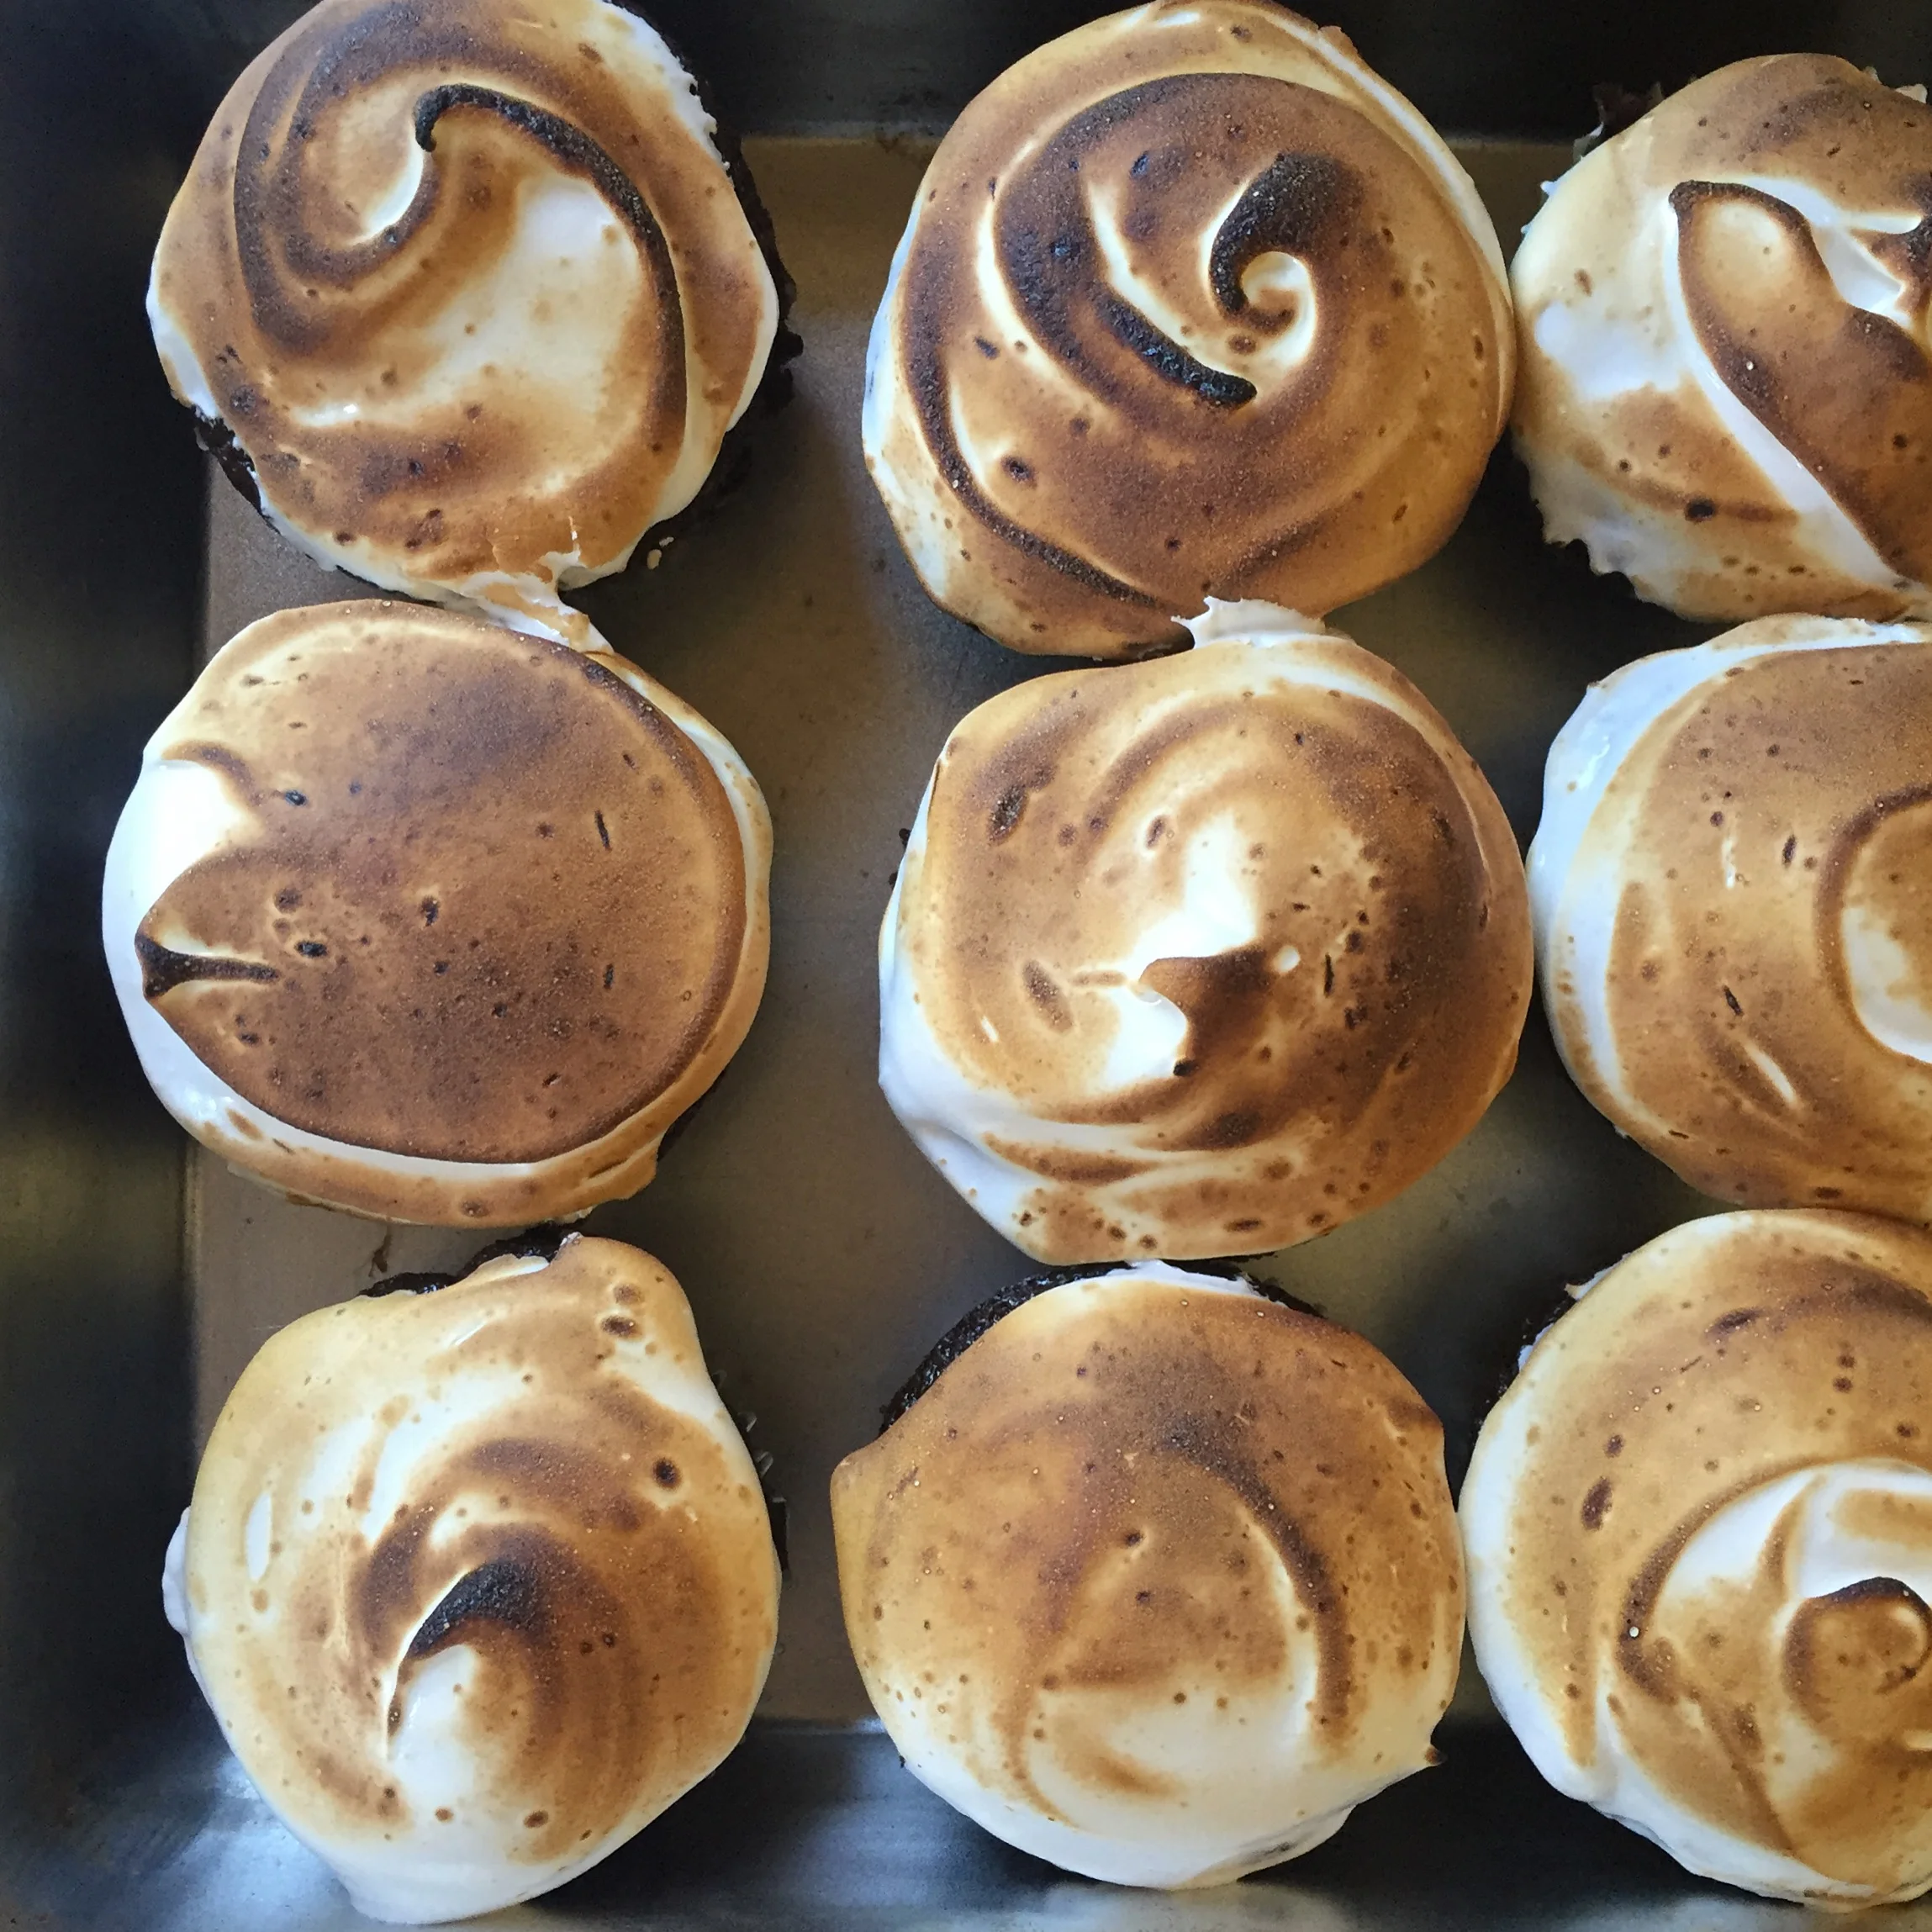
  1. Frost cooled cupcakes with marshmallow frosting. Doesn't need to be perfect, and the thicker the frosting, the better!

Oven-toasted method

  • After cupcakes are all frosted, place cupcakes on a sheetpan. Under a low-broiler, return cupcakes to oven to toast tops. Keep a close eye, I've burned the tops before. 😳

Blow-torch method

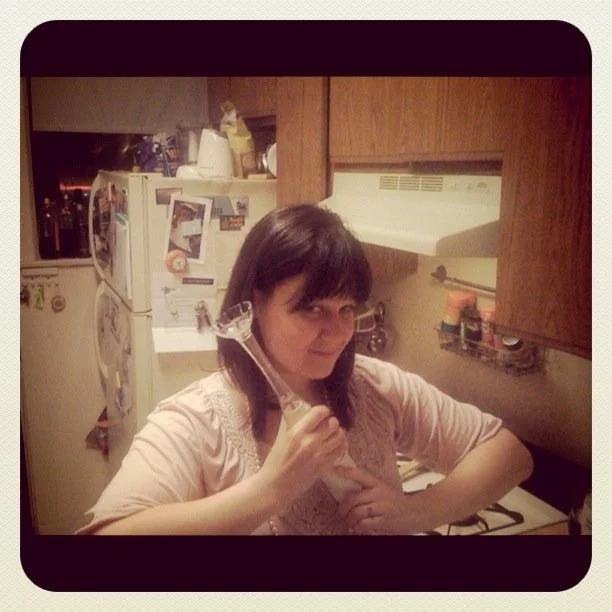
  • After cupcakes after frosted, take a blowtorch and quickly toast the top of each cake. See my video!


a tip for you

to crumble your graham crackers, put a few in a plastic ziplock bag and pound out with an ice cream scoop, or run them all through your food processor to create the perfect crumb.

Say it with food.
 

I curled up to the fleece blanket a little closer as I flicked through the channels. Food Network seemed like a safe choice for binge watching that January afternoon, now almost ten years ago. Post-college life only allowed a few days at home at a time, and although the entire four years prior I had been thinking of ways to get out of the house when I was home - now that the time was limited I wanted to stay in as much as possible.

I remember my first episode of Barefoot Contessa as plain as day. Say it with Food is the name of the episode, and Ina brings a breakfast basket to a friend filled with fabulous things because, well, she's fabulous.


Yesterday I did my first craazy long Instagram story about making Gluten Free Corn Muffins for my friends. Each Tuesday we host community group/small group at our house and we use to just randomly here and there do a potluck. But I realized it stressed everyone out to run and pick up something right before our 6:30pm group time, and our group FAR TOO MUCH enjoyed the eating and socializing and we'd be left with 30 minutes for our actual Bible Study. So when our church announced it would be doing a church-wide small group study called "40 Days of Community" I decided we needed just that - community.
So we opened our house up even earlier than before (doors open at 5:45pm!) and dinner would be ready and waiting - please just bring yourselves.

Here's the trick.

A couple of folks in our group have food allergies...and everyone is a little bit of a gourmand so pizza every week would not do. So using my new favorite website called Plan to Eat, I plan each week to have a gluten free, highly delicious and super simple meal for my people. It's my way of serving. It's my way of loving. I just say it with food.


Ina's Gluten Free Skillet Corn Bread


Last week we had a crazy lake effect snowstorm that dumped almost 2 feet of snow on little ole' Racine. So the big pot of chili I had made needed to be frozen and saved for next week (when you've just finished making dinner for 14 people - you gotta save that puppy for when the 14 people are actually coming). So this week, as the chili thawed, I whipped up my favorite corn bread recipe, minus the gluten. A simple swap of Bob's Red Mill All Purpose Gluten Free Flour did just the trick.

Ingredients

  • 3 cups all-purpose flour (regular or gluten free!)
  • 1 cup sugar
  • 1 cup medium cornmeal
  • 2 tablespoons baking powder
  • 1 1/2 teaspoons salt
  • 1 1/2 cups whole milk
  • 1/2 pound unsalted butter, melted and cooled
  • 2 extra-large eggs


Directions
1. Preheat the oven to 350 degrees F with your skillet inside to get hot.
2. In the bowl of an electric mixer fitted with a paddle attachment, mix the flour, sugar, cornmeal, baking powder, and salt.
3. In a separate bowl, combine the milk, melted butter, and eggs.
4. With the mixer on the lowest speed, pour the wet ingredients into the dry ones and stir until they are just blended.
5. Remove the skillet from the oven and grease the pan one of two ways. Either a) spray with cooking spray or b) place a tablespoon of butter in the pan and spread it around the hot skillet until it melts.
5. Spoon the batter into the skillet, filling it almost to the top. (there is enough batter for two batches...I just baked my second half in a cake pan).
6. Bake for ~20 minutes, until the top is crisp and a toothpick comes out clean.
7. Cool slightly and remove from the pan.

 
keeping it simple

Driving home after dinner the other night with a friend, the talk turned from babies, jobs, design, and clothes to blogs. Why are blogs so hard to write? Should posts be personal? Do they need a focus? What should it be? What should mine be? What is interesting? Will people read it? Do I care?All these questions came up unanswered as we turned in the driveway - but I could tell ideas were reeling through each of our heads.I get the feeling food blogs might be a bit of old news - something that peaked with the last theater showing of Julie & Julia before Redbox, and took on a whole new identity with the birth of Pinterest "food" boards. There are much easier, quicker, cut-around-the-personal-blah ways of accessing recipes online. But is that why we read food blogs? Is that why we write food blogs?My idea really took flight on my lunch break today. I have been coming home for lunch (I work a mere 5 highway miles away from my office) in an effort to save money, and save my waistline by cooking my own healthy meals at lunch. Today, I decided to make a quick "breakfast burrito". Andrew is usually the scrambled egg maker in residence, but with him out of town  - I was left to my own devices. As I stood stirring my stringy, dry scrambled eggs at the stove (frustrated to no end) I felt defeated. My list of "easy things I can't make" only has really contained Chocolate Chip Cookies until today (true fact). Adding scrambled eggs to that list made question -  I am so willing to dive right into roasting my first whole chicken last week, creating my own spice blends and combinations of my favorite dishes...why do I not take this on with the same gusto I do when making those?SO - back to basics. No, I'm not going all Ina Garten on you (yet)...but back to the beginning of how to really cook. I sat down to eat my scrambled egg mush and pulled two cookbooks off the shelf - first, How to Boil Water and second, How to Cook. Recipe by recipe I'm going to make each one - no matter how simple, no matter how complicated. No matter how many dishes (sorry Andrew), no matter the left overs. And maybe I'll even throw my own little twist into each dish!So if you'd like to join me, cook along with me - let me know! Let's learn how to cook!

sturdy's and the city

New York....New. York.Ahhhh how a weekend in this city can re-energize my soul and tire my legs.
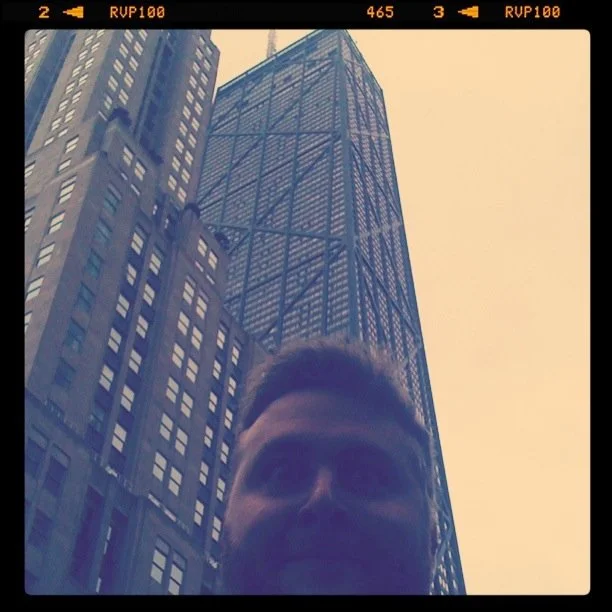
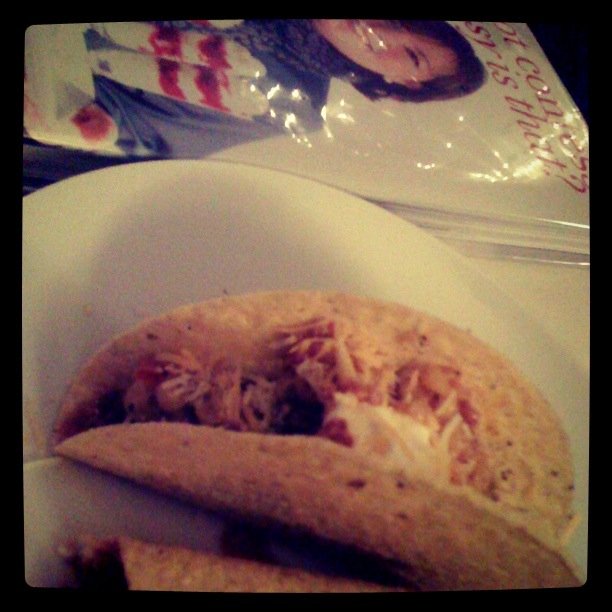
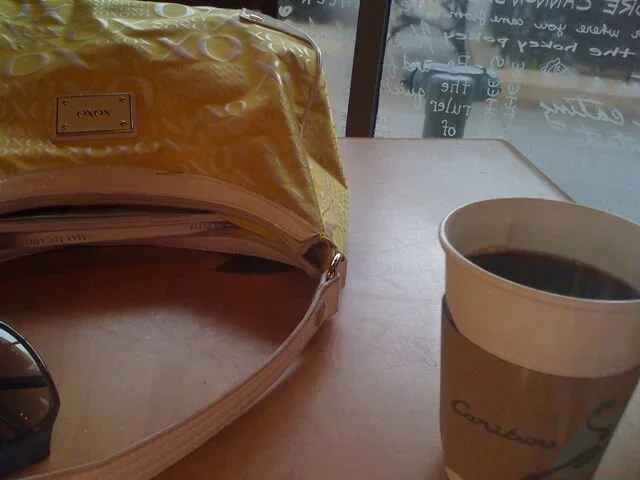
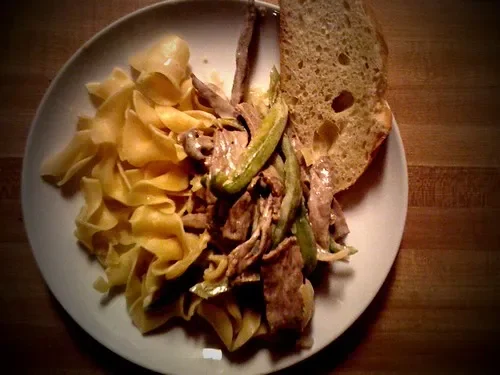
Our anniversary is in October, so Andrew decided the perfect way to celebrate was with an east coast "stay-cation" to NY on one of the last beautiful "indian summer" weekends this past fall. We like to stay at this little brownstone on the Upper West Side where the streets are quiet, friendly, and Central Park is a mere 1/2 block to the east. So we packed our bags and rolled towards the city on Friday morning.The city was wonderful: "quiet" and 65 degrees cool as we took our morning walking down 3rd Avenue from Grand Central to SoHo (yes we walked from E 42nd street to below Houston...44 blocks). We explored for a bit, shopped, and headed north to the UWS. 20 minutes and a cat nap later we were walking down Columbus to our favorite West side lunchery: Nanoosh. They are a little Middle Eastern place between 68/69th on Broadway just north of Lincoln Center. We love their hummus, tabbouleh, and especially their mint iced tea. It's perfection. Plus, outdoor seating to people watch on a beautiful fall day.For dessert, another west side find...Levain Bakery.Um...ya. Only the best, warm, crumbly, delectable chocolate chip walnut cookie in New York City...truly the best cookie you'll ever eat. Not to be beat out by the laundry list of other delicious treats we had during our city-stay. I mean: we had crepes. we had beer. we had panini's. we had the best sweet potato fries i've ever had. The cookie was just a snack on our way back downtown. But oh so good.

apple pomegranate tabbouleh

One thing I have really missed about our neighborhood in Chicago, was you could get good middle eastern food at multiple places within a 3 block radius of our house. I have been making middle eastern food at home for a few years now...things like hummus, tabbouleh, taziki sauce, jerusalem salad; but I think this recipe always is my favorite. You can make it year round since most of these ingredients simple to find. My favorite part is the chopped fresh parsley, crisp apples, and tart pomegranates that pop in your mouth.

  • 1 cup bulgur
  • 3 tomatoes, seeded and chopped
  • 2 cucumbers, peeled and chopped
  • 1 apple, chopped - any kind (preferably something crunchy but not tart)
  • 1 cup of pomegranate seeds (you can buy these at the grocery store if you don't want to seed your own pom)
  • 2 green onions, chopped
  • 3 cloves garlic, minced
  • 1 cup chopped fresh parsley
  • 1/3 cup fresh mint leaves
  • 2 teaspoons salt
  • 1/2 cup lemon juice
  • 2/3 cup olive oil
  • 1/2 tbs paprika

Place bulgar in a pan (I use a longer pyrex glass dish) and cover with 2 cups boiling water. Soak for 30 minutes...the bulgar should soak up all the water. Fluff with a fork.Chop all the above ingredients and combine in a bowl.Toss everything in a bowl with bulgar. Sprinkle paprika and refrigerate for 2-3 hours to let flavors develop. Toss again before serving.

12 days - tuxedo truffles

12 days til Christmas- are you freaking out?I am not freaking out...yet... :)I have bought ONE present for Christmas...and it's sitting in a Target bag closed shut waiting to be wrapped. I had bought some gifts for my mom & mother in law, but ended up returning them. So I am back at square one.Sunday I'm meeting some friends in NY for the day, so I'm hoping to just do one giant swoop (with the rest of those 50,000,000 tourists)...we'll see.I don't know why I'm not in the Christmas mood this year, and honestly you Connecticut folks might want to slap me, but this northerner desperately wants some snow on the ground (and NO I haven't forgotten our lovely Halloween snowfall!) Honestly, I am thinking more about Christmas food. Desserts, cookies, family traditions, appetizers for parties, anything Christmas+food equals.Gift giving is not my thing. Trust me, I have given you all gifts many times over in my mind. When I shop, I usually see something I would like to give... but I don't end up buying it because it doesn't seem like a good enough gift! It feels like I'm just buying "stuff"...and that's not how I want to show my love for those I'm buying for. As I have gotten older, I have started to make food for Christmas gifts...concentrating most on treats I'm guessing my gift recipients would never make themselves.Last year (and probably 15 pounds ago due to it!) I made these truffles for the gifts along with a few other things (to be revealed later!). It was days of testing different ganache, going through quite a bit of cream, and scooping/ dipping hundreds of tiny chocolate balls that resulted in a whole lot of love and chocolate.Hopefully these are gifts to you...special things you and I will only  (dare?) make this time of year. Hooray...the holiday's are here!Side note: Also, as you may have noticed I take pictures of everything...unfortunately, these are the only a few photos I could find from Christmas last year. See below, you'll understand my confusion...no truffles but a man in full snowsuit riding a bike and some potato chip sunglasses.

tuxedo truffles

The inside of these tiny bites of glory is a soft, delicious, smooth ganache. You can choose to "dress" them in a hard chocolate coating or roll them in powdery delicious dark chocolate cocoa powder. Mmm...enjoy.

makes 24 truffles depending on your scooper size..I use a smaller one

ingredients1/3 cup of cream1 bag white chocolate chips1 tablespoon unsalted butter1/2 bag of dark chocolate chips1. take a small sauce pan in heat the cream over very low heat2. put your white chocolate chips in a bowl (I prefer glass I don't know why)3. once the cream is hot, pour over chocolate chips & wisk until chocolate has melted.4. Add butter and wisk until it's smooth and beautiful.5. refrigerate your ganache for 1-2 hours or until firm.6. While you're waiting (or when your ready to scoop the truffles), put a silicone mat or parchment paper on a baking sheet to get ready for the next step.7. Use your favorite scooping tool (this is mine) and scoop out as many little ganache balls as you can get out of the white chocolate. If you don't have a scoop, you can use a spoon. Roll the ball between your palms to make them perfectly round. Do this quickly though, as the heat of your hands can melt the chocolate and then you have a mess (!) Refrigerate on the lined baking sheet one more hour to harden (or my favorite, stick the pan out on the porch or in the garage...hey..it's cold out there!)8. Put dark chocolate chips in a microwavable bowl, and microwave in 20 second increments (stirring inbetween) until melted. Stop microwaving when there are a few chunks left in the chocolate and stir until they melt along with it. It makes the chocolate look nicer in the end.9. Dip each ball in the melted chocolate (2 forks make it easier to fish out dipped chocolate balls). If you like to get fancy, immediately roll in cocoa powder after dipping in the melted chocolate (I prefer Hershey's dark chocolate cocoa powder...but any kind you'd like). OR you can roll in anything that sounds tasty! (coconut, chopped hazelnuts, sprinkles, rainbows)10. You can place them back on the parchment or on a cooling rack to harden.11. Wait 10 minutes before eating them all to regain your composure to devour them ALL. And to let the chocolate set. :)

holiday dreaming

With Thanksgiving on the horizon, I am getting more excited every day....maybe about the three day work week, maybe about seeing my friends, maybe about the food...so much to look forward to this week!Times when we've been in Chicago, we have shared a thanksgiving table with some dear friends, Mabrie & Jason (and a few others!). This year we're heading to W. New York to the Burgetts to give thanks with a part of our "Chicago family".I can't really name any one reason why I really like thanksgiving...actually I'm more of a Christmas morning girl. That is the food holiday I have been dreaming about.Getting up early (more like being shook awake by my sisters), everyone in their pj's sitting around the tree waiting as each family member pulls themselves away from the covers and gets a cup of coffee before joining us. Our dog would have usually found her chew bone by now. Snow is falling, it's cloudy.Now fast forward to the Christmas I am dreaming up this year. Andrew and I will be home in Connecticut on Christmas morning. On our rustic dining table I have taper candles lit in my hurricane glasses, greenery on the table, braided cardamom bread (with pill sugar...very important in my dream for some reason!).  Coffee in our Swedish kettle, mimosa's, our colored lit tree & us sitting in the living room in Christmas pajamas, an egg dish, some sausage, and my warm brioche buns with honey butter for the morning & herb butter for the afternoon snacking.These buns...ahhhh are the buns you dream of. My sister growing up was the "bun" girl, at all holidays she ate buns (at times only buns?). I made these a few years ago, and I can't remember how many she ate (mostly because we were ALL eating them at record speed). But I hope that you enjoy these buns for thanksgiving this year, for parties in between, and your dream christmas morning.

warm brioche buns

from cooking light, november 10makes 24 rollsYou will need two things: a muffin tin, and about 45 minutes on november 23th.Ingredients1 package dry yeast (about 2 1/4 teaspoons if you use the jar like me)1/3 cup warm 1% low-fat milk3 1/2 cups flour1/3 cup sugar1/2 teaspoon salt4 large eggs, lightly beaten8 1/2 tablespoons unsalted butter, softened and cut into cubesCooking spray1 tablespoon water1 large egg white

Preparation

Dissolve yeast in warm milk in the bowl of a stand mixer fitted with the paddle attachment; let stand 5 minutes.Lightly spoon flour into dry measuring cups; level with a knife.Add flour, sugar, salt, and eggs to milk mixture; beat with a stand mixer at low speed until smooth, scraping down sides of bowl with spatula as needed.Remove paddle attachment; insert dough hook.Mix dough at low speed 5 minutes or until soft and elastic and dough just begins to pull away from sides of bowl.Cut 6 1/2 tablespoons butter into large cubes; add half of butter to dough, mixing at medium speed to blend.Add remaining half of butter to dough; mix at medium speed until incorporated. Mix dough on medium speed 4 minutes or until smooth and elastic.Place dough in a large bowl coated with cooking spray, turning to coat top. Cover and let rise in a warm place (85°), free from drafts, 1 hour or until doubled in size. (Gently press two fingers into dough. If indentation remains, dough has risen enough.)After dough has doubled, punch dough down; form into a ball.Return dough to bowl; cover with plastic wrap, and refrigerate 8 hours or overnight.---The next day (or 8 hours later), uncover dough; let stand 90 minutes or until dough is at room temperature.Divide dough into 4 equal portions. Working with one portion at a time (cover remaining dough to prevent drying), cut dough into 6 equal pieces.Roll each piece into a 1 1/2-inch ball.Repeat procedure with remaining 3 dough portions to make 24 rolls total.Place rolls in muffin cups coated with cooking spray. Cover and let rise for 45 minutes or until almost doubled in size.Preheat oven to 350°.Combine 1 tablespoon water and egg white; stir with a whisk. Gently brush rolls with egg mixture.Bake at 350° for 14 minutes or until golden.Place pans on wire racks.Place remaining butter in a microwave-safe bowl; microwave at HIGH 20 seconds or until butter melts. Brush butter onto rolls(please please please make these!! you will not regret it!)

happy birthday mama

Today is my mom's birthday. She didn't want me to post anything on facebook, so I thought I'd post it on my blog!
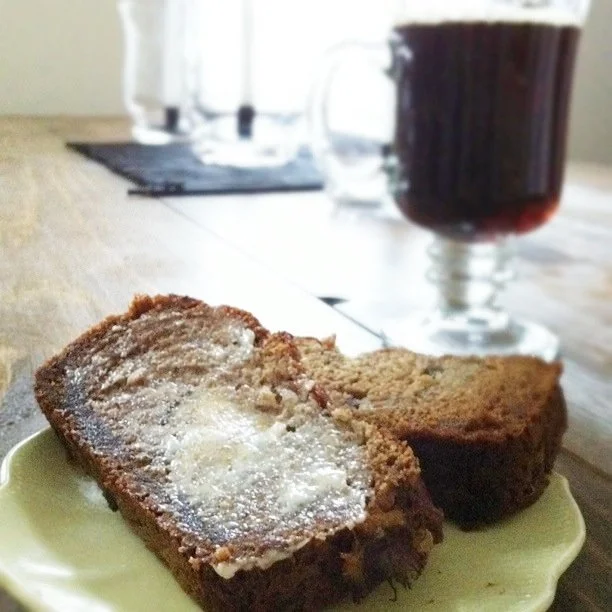
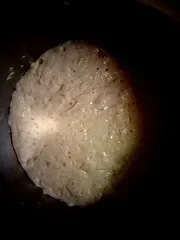
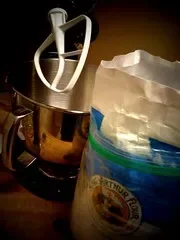
My mom is a great lady: she has helped me pack more apartments then I care to count. She has been (happily) dragged to many breakfast, lunch, brunch, dinner & dessert places around town...and is even willing to let me still drag her around to places on the East Coast! She is a listening ear, a comforting voice, and a strong wife and mother. She is the mom I want to be when we have some little Sturdlings of our own. She is fun, youthful, up for anything, and selfless.One of my mom's favorite things are my petite vanilla scones, and frankly, who wouldn't want to make these for breakfast and sit down and enjoy them with a hot cup of coffee and mom! I cannot wait to enjoy these with her in 16 days when she's here!

Petite Vanilla Scones

From Pioneer WomenMakes 12 mini sconesIngredientsSCONES3 cups All-purpose Flour2/3 cups Sugar5 teaspoons Baking Powder1/4 teaspoon Salt2 sticks UNSALTED Butter, Chilled1 whole Large Egg3/4 cups milk+1 tablespoon lemon juice2 whole Vanilla Beans or 1 tsp vanilla extractGLAZE3 cups Powdered Sugar, Sifted1/2 cup Milk1 whole Vanilla Bean mixed in ORif you do not want to buy a vanilla bean, 2 tablespoons of Lars Swedish Sugar will do...or nothing but the glaze would be just fine.

Preheat oven to 350 degrees.Split the vanilla beans down the middle lengthwise and scrape out all the vanilla "caviar" inside. Stir caviar into cream. Set aside for 15 minutes.Sift together flour, 2/3 cup sugar, baking powder, and salt.Cut cold butter into pats, then use a pastry cutter or two knives to cut the butter into the flour. Keep going until mixture resembles crumbs.Mix vanilla cream with egg, then combine with flour mixture; stir gently with a fork just until it comes together.Turn dough onto a floured surface and lightly press it together until it forms a rough rectangle. (Mixture will be pretty crumbly.) Use a rolling pin to roll into a rectangle about 1/2 inch to 3/4 inch thick. Use your hands to help with the forming if necessary.Use a knife to trim into a symmetrical rectangle, then cut the rectangle into 12 symmetrical squares/rectangles. Next, cut each square/rectangle in half diagonally, to form two triangles.Transfer to a parchment or baking mat-lined cookie sheet and bake for 18 minutes, removing from the oven just before they start to turn golden. Allow to cool for 15 minutes on the cookie sheet, then transfer to a cooling rack to cool completely.VANILLA GLAZETo make the icing, split one vanilla bean in half lengthwise and scrape out the caviar. Stir caviar into milk; allow to sit for awhile. Mix powdered sugar with the vanilla milk, adding more powdered sugar or milk if necessary to get the consistency the right thickness. Stir or whisk until completely smooth.One at a time, carefully dunk each cooled scone in the glaze, turning it over if necessary. Transfer to parchment paper or the cooling rack. Allow the glaze to set completely, about an hour. Scones will keep several days if glazed.
taco al pastor/tacos for a pastor

I'm happy to report we are settling in! I feel about 60-80% settled...and the percentage will definitely increase when a certain husband will take a certain mattress out of a certain dining room. :) Seriously, we have been in our place almost two months and it's beginning to feel like home. The more times I run my neighborhood loop, walk Main Street, and pull in the driveway; the more it feels good to call Middletown home.

How are things going you ask? Good I guess! Fall is slowly creeping upon us here in New England, and every day the leaves are looking more golden than green. This morning it was 55 degrees...I'm wearing a long sleeve shirt & vest today! (with sandals of course). Pictures are finding their place on our walls, I'm discovering new running routes, and our everyday activities are turning more into a routine. Sundays are a little nuts...it was nice to move here during the summer when the Youth have their break from Sunday/Wednesday activities, but after the fall kick off Sundays haven't been the same! Andrew gets up and gets out the door to church at about 8:15am and I join him for the 11am service. We get home about 1:00pm, have lunch, and chill. He goes back to church at 4 or 5pm for youth group and gets home about 9pm. Yes, WOW! What a work day! Needless to say, he loves it...which makes me so happy to see.

20111008-201952.jpg20111008-202048.jpg20111008-202014.jpg20111008-202034.jpg

As for me, work is also picking up. Fall in ministry=busy! Last month I had a revelation to "simplify"! As you can see from my pictures, it was a busy summer of weddings, a trip to the UP, and Jasmer babies! As my trips wound down; I toned down the amount of things I was volunteering for, suspended my NYC marathon registration until 2012 and went "ahhhhhh!". This is what I have really been needing: a season to be renewed, refreshed & rest!

I guess many of you don't really know that yes, I have a job! I am the Office Manager for the East Coast Conference of the Evangelical Covenant Church. I handle all administration for our office, as well as brainstorm the direction of our communication methods (website, design, etc). My office that is the umbrella for all the Covenant churches in the East Coast from Maine to Washington DC. So, my job is a new kind of "busy": there are no city-wide service days to plan and no toy stores to brainstorm for as Christmas approaches. While I do miss being "in the trenches" of ministry, administration and communication design is my gifting! And I get to do both of those things here! I also have been doing a lot of freelance graphic work at home (hence why my blog has been so neglected). It's a good creative outlet for me outside of work. So...that's the long and short of what I do.

Last weekend we had some friends over for dinner...this is something I have been dying to do but just have been too busy. I like to get to know people over food.

pollo el pastor
1 pound chicken tenders or breasts
1-2 canned chipotles in adobo sauce
2 tbs olive oil
1/2 tsp chili powder
1/2 garlic powder
1/4 tsp salt
1/4 tsp cumin

What you need:
Glass bowl
Fry pan
If you don't have a fry pan that can go from stovetop to oven, you'll want a small sheet pan.
Tin foil
Cooking spray

1. Open the can of chilies and mince 1-2 depending on your spice preference. I find 1 gives the flavor I want, but two gives them the kick of spice.

2. Combine chicken, chilies, olive oil and spices in bowl and cover. Place in fridge to marinate for at least 30 mins or longer.

3. Preheat oven to 325 when your ready to start cooking.

4. Spray pan and set on high heat. (We are just going to sear the meat to lock in the juices so don't worry about burning.)

5. Place each piece of chicken you have in the hot pan. Sear for 1 minute on each side.

6. Cover the pan with foil (use oven mits...hot!) and place in the oven for 25 minutes. (if your using a sheet pan, line the pan with foil for easy clean and cover chicken with foil too).

7. Remove foil and cook for 5 minutes longer.

8. Remove chicken from the oven and cover with foil on a cutting board to rest for 10 minutes.

9. Slice and dice the chicken. Return to the pan on medium heat. Add the pineapple with juice and sauté until juice is evaporated.

10. Toss with fresh chopped cilantro and lime juice. Eat on warm corn tortillas topped with diced onion, queso fresco, more chopped cilantro, and lime chaloula hot sauce.

Irene's Banana Bread

Saturday- we prepared for Hurricane Irene.Part of me was all like "THIS IS MY FIRST HURRICANE!!"Part of me was like "ahhhh these is my first hurricane."As I started to write this post, I was anticipating the lights flickering off, our marathon of "50 best documentaries to see before you die" to end, and the rain to really pick up. I have to say, this little Yooper girl knows how to handle midwest thunderstorms and even a "Snonami"

 But a hurricane? No clue. We stayed up until 2:30am in anticipation. What we got wasn't a hurricane. It was a 500 mile wide thunderstorm and a Sunday morning free of church and responsibilities.And then Sunday morning, we went out and explored...while it was still raining with 50 mph wind gusts...but if you have ever walked between the Hancock Building and Watertower Place on a cold, windy, Chicago day...you have felt worst wind gusts then Irene produced...trust me!20110829-093446.jpgSo what did I do instead of hide from Irene? I cooked (and cleaned a lot)!I made a giant pot of my potato leek chowder.I made banana bread.I made donuts.I made chocolate sauce to dip the donuts in.20110829-093459.jpgIf you are Gluten Free, well then this is your lucky day! I'm going to share with you this absolutely delicious banana bread recipe from Babycakes NYC. And there is also a surprise...I dare you to make the chocolate dipping sauce and drizzle it over the banana bread to make it THE most decedent, home-style treat.

Erin's Favorite Banana Bread Recipe from Babycakes NYC

12 Servings | Weight Watchers Points + 5 points per slice.

1 1/2 cups Bob's Red Mill All Purpose Gluten Free Flour (gotta be Bob's, no sub)1 1/2 teaspoons baking soda1 1/2 teaspoons baking powder3/4 teaspoons xanthan gum1/2 teaspoon salt1 tablespoon cinnamon

1/3 cup oil (I used canola)2/3 cup agave nectar1/2 cup rice milk2 tablespoons of good quality vanilla1 1/4 cups mashed bananas

1. Preheat oven to 325 degrees.2.Brush your loaf pan with oil and set aside.3. In a medium bowl, measure in flour, baking powder, baking soda, xanthan gum, salt, cinnamon and whisk.4. Add oil, agave nectar, rice milk and vanilla and then mix again.5. Fold in bananas until nicely distributed.6. Pour batter into loaf pan (only halfway!) and set in the oven.7. After 20 minutes, check on the loaf and continue baking until it passes the toothpick test. (Mine got very brown staying in the oven so long because the center took the longest to bake).8. Remove from oven and cool for 30 minutes.*If you have extra batter, you can make them into muffins. I put mine in doughnut tins...but they turned out too moist to be a traditional doughnut texture, but it was still fun.

Sugar Sweetened Chocolate Drizzle Saucefrom Babycakes NYC

Makes enough to cover banana bread loaf. Weight Waters + Points: Add 1 point to each slice of bread.

4 tablespoons of your favorite chocolate chips (I use vegan chocolate chips because they are dairy free)1/2 tablespoon of oil (I used canola)pinch of salt

1. In a double boiler or the microwave, melt chocolate chips 85-90% of the way (you will see some unmelted pieces). Remove from heat and stir until smooth.2. Add oil & salt; stir until combined.3. Drizzle or dip. Let set for 3-4 hours to harden, or dig in immediately for dribbly chocolate.

times they are a changin'

Diptic

I know I have been so absent on my blog lately and I am sorry! I have been zipping here, zipping there, downing cups of Dunkin' Donuts, and craigs-listing my little hiney off because...as of Sunday, my husband Andrew has been offered the position of Youth Pastor at Bethany Covenant Church in Berlin, Connecticut!It is a wonderful church, which amazing kids, parents, volunteers, etc that we are so blessed by already. We thank God for this opportunity, and we are excited to become New Englanders! We are very sad to leave the midwest, but we are trying not to look at it in the way of God is taking us from the midwest, but He is bringing us to Connecticut. Reverse psychology...smart.Anyways: I wanted to post a SHOUT OUT to my soon to be home and tell you all about the news in our lives!Because we've been traveling so much lately back and forth to Connecticut and home to Upper Michigan for my grandfathers funeral, I haven't really been able to cook all that much. But I was reading the new Bon Appetit on the plane a few weeks ago, and they had an entire section on the Lobster Roll. Being new to the idea of fresh lobster, the only one I've had has been at Lenny & Joes near Hammonasset Beach...Connecticut style lightly sauteed in butter and served warm (unlike traditional New England style...served chilled in mayo)I think I might prefer New England style...but you decide.

Lobster Roll

Connecticut Style

Weight Watchers Points+ 4 servings: 7 points (with the low cal bun option)

1 1/2 Tbsp light butter, melted4 roll(s) reduced-calorie hot dog bun(s), split open or if you're on the east coast, use New England Style...see my note below.1 lbs uncooked lobster meat (about 2-3 tails fresh or frozen&thawed)2 Tbsp regular butter¼ tsp salt¼ black pepper, freshly ground2 tsp fresh lemon juice½ medium lemon, quartered

1. Brush melted butter on inside of each split hot dog bun; set aside.2. To remove meat from lobster tails, turn tails upside down and make a slit with a sharp knife in the underside of shell from top to tail. Hold shell with both hands and crack shell backwards so you can pull lobster meat out of shell in one piece, starting at top and working it out of the tail.3. Slice raw lobster into bite-sized pieces.4. Heat skillet over a medium-low heat; add butter, salt and pepper. When butter has melted, sauté lobster until pink, about 4 minutes. Remove lobster to a plate and deglaze pan with lemon juice; remove sauce from skillet and set aside.5. Carefully wipe skillet clean; set over medium heat. Toast hot dog buns, buttered-side down, until golden brown.6. Lay each toasted bun open on a plate and fill with lobster. Pour deglazed sauce over rolls and serve with lemon wedges. Yields 1 lobster roll per serving.New England/Maine Style

Weight Watchers Points+ 4 servings: 8 points

1 pound cooked lobster meat, torn into bite-size pieces6 tablespoons mayonnaise (or miracle whip if you're on WW)Kosher salt & pepper2 tablespoon butter, room temperature (1/2 tbs per bun)4 hot dog rolls (again, if you're on WW you should use low cal, but New England style is fun too)1 head of butter lettuce, thinly sliced

1. Place 4 tbs of mayo in a bowl with the lobster...slowly mash the meat (especially the claw meat) into the mayo...this will give it a nice moist and smooth consistency. Mix in remaining tablespoon of mayo, salt & pepper to taste...chill until ready to serve.2. Butter outside surfaces of hot dog rolls. Heat medium skillet over medium-high heat. Place rolls, 1 buttered side down, in skillet; cook until browned slightly, about 2 minutes per side. Open rolls. Fill with lettuce, then lobster mixture, and serve.*For all you Midwestern folks like me...New England style hotdog buns (seen in the picture above): It’s basically a hot dog bun with white sides that’s split at the top, instead of the side. This way you can toast both sides and have it stand perfectly upright when stuffed with lobster. You’ll want to butter both sides of each bun and grill for 2 minutes per side, until golden brown.

comfortable.

I am a person who enjoys comfort. Security. Knowing what to expect.These are some things that bring me comfort...the feeling of the weight of uncertainty being lifted (some may seem silly to you). Andrew and I have made a theme for this year, no expectations. There is a funny thing that happens when you are so confident in yourself to NAME your year...God totally says "okay, so this is what we're going to do" and he ROCKS you. 2010 was a year of un-comfort in so many ways. It was as if we were in our first storm as a family...people we loved died, we lost our passion for things we use to love, and we were forced into a time of surrender. I feel like the ultimate stubborn streak overcame me! I was confronted by the fact that when I have expectations, I cannot grow, I cannot see what is best for me, and I cannot love those around me well.So the simple phrase that I've kept in my back pocket these past 70 days is no expectations (sometimes when I type it it makes me think of the old jean company "no boundaries" haha)Anyways, I cannot wait to share with you the rumblings of this revolution in our life...but I can't just  yet.

Potato Leek Chowder

Weight Watchers Points+ 8 servings: 4 points

adapted from Around My French Table by Dorie Greenspan

In the mean time, curl up with this delicious, comfortable soup adapted from the book "Around my French Table". My addition of corn & roasted garlic make it not as French, not as traditional, but extra delicious.1 head of garlic1 tsp of olive oil2 tbs unsalted butter1 large Spanish Onion, diced3 medium leeks, sliced into half moons (only use the white and light green part)Salt and Pepper2 russet potatoes, diced (save one to add in after you've pureed the soup)4 cups chicken broth3 cups water1/2 cup corn6 thyme sprigs1. Preheat oven to 400 degrees.2. Take one head of garlic and slice the top off. (see notes at bottom for guidance)3. Drizzle the top with oil, and place in a baking pan (put foil down on the bottom, and cover the top of the bulb with foil...I like to just use a ramekin if I'm roasting one head)4. Roast for 1 hour, removing foil the last 10 minutes.5. Melt butter in Dutch oven or soup pot over low heat. Add onion and stir until they glisten with butter, then season with salt and pepper, cover, and cook for about 10 minutes, until onion is soft but not colored6. Add remaining ingredients (except the corn & 1 of the diced potatoes), along with a little more salt, increase heat, and bring to a boil. As soon as soup bubbles, turn heat to low, mostly cover pot, and simmer gently for 30 to 40 minutes, or until all vegetables are mashably soft. Taste soup and season generously with salt and white pepper.7. With an immersion blender, carefully blend soup until pureed (careful not to splash)8. Add in remaining diced potatoes & corn, simmer on low for 15 more minutes or until the diced potatoes are softer.Enjoy!

back in the saddle

i fell off the wagon this weekend.well...i think the wagon pushed me.I read an article the other day about how eating out and take out affect our lives and it got me thinking:

"For better or worse, we live in an age of multitasking, and being so busy means that many of us take shortcuts when it comes to food. According to the National Restaurant Association, nearly a third of adults say that take-out food is essential to the way they live. Not just helpful — essential."  -Article By: Amanda Genge

So why do I say the wagon pushed me? My wagon is my day to day life I think...life here for me is full of commuting, quick decisions & distractions and just plain busy. We are always going from this meeting to work to this lunch to running to the grocery store, and finally home; exhausted, hungry, and unwilling to leave the couch+netflix/magazine/iphone/computer(whatever is my newest distraction at home).Is this a city-dwellers problem, or just a plain old human kind problem? I think a little of both.Ok so I got my fill of DELICIOUS food that I didn't make this weekend...but here is what I did make last night. And I want to tell you now, O_M_G the old bay season is the secret trick ingredient.

Skillet Shrimp with Orzo

Weight Watchers Points+ 6 servings: 3 points

adapted from Martha Stewart

A few months ago I was walking down Michigan Ave with my sister, and Giada De Laurentiis was doing a demo in front of the Wrigley Building and was passing out boxes and boxes of orzo. Ever since then I have been trying to find ways to use it, and I think I found the perfect place for this pasta to play a leading role.

1 tbs olive oil1 tbs chili infused olive oil (if you don't want to buy it or use it...just use another tbs of regular olive oil)12 oz medium cooked/frozen shrimp1 tsp mustard seeds1 cup shredded carrots2 leeks, sliced into half-moons4 cloves of garlic sliced1/4 tsp old bay seasoning1/4 tsp red pepper flakes1 cup orzo1 1/2  cup chicken broth

1. In a 12-inch skillet, heat 1 tablespoon olive oil over medium heat. Toss shrimp with salt and pepper. Saute, tossing, until just cooked through, about 3 minutes. Remove.2. Add remaining tablespoon olive oil to pan; stir in mustard seeds. Cook until seeds begin to pop, about 30 seconds. Add leeks, carrots, and garlic. Cook, stirring often, until leeks are tender, about 5 minutes.3. Add red pepper flakes and old bay.4. Boil the chicken stock5. Stir in orzo, peas, and the boiling chicken stock; season with salt and pepper.6. Remove from heat. Cover; let stand 5 minutes.7. Add shrimp; stir gently.My lesson learned was two fold this week: I can make delicious food at home that is just as good as take out, but sometimes when I'm short on time...it's okay to cheat a little. To make eating out about soaking in time with friends or a breather to my busy day. For me to make take-out food helpful in my life... not essential.Also, check out my new and ever changing list of my favorite places to eat out in Chicago...refinedsugar.wordpress.com/chicago/

the art of eating in

"So the eating in is going well!"*Blank Stare* or a well meaning "Oh, not you?!" is the reaction I get from most of my friends and coworkers who find that this foodie has taken a hiatius from my (sometimes almost) daily trips to Whole Foods, Butterfly, Sultans...I could go on.Although I have to say it's been hard that most of our lunch conversation this week has been "Let's go around and share your favorite coffee shop in Chicago" or favorite bar, favorite thai, favorite burger joint...ah!!! Temptation!!So yes, it's going well. I have officially lost 1.2 lbs so far (hey...it's something!) so the scale is being nice to me again. Phew.The first 11 days of 2011 have brought us a few delicious recipes.Carrot Ginger SoupFajita'sOrange ChickenRoasted Vegetables with Maple Brussels Sproutsand our favorite Pizza RecipeI'm going to share the Carrot Ginger Soup recipe today, because I brought it to our staff potluck and it was a hit!But not before I tell you about how important this week is.If you didn't know, my husband is a Graduate Student at North Park Theological Seminary where he is pursuing his Masters in Christian Formation. Fancy, eh? He's graduating in May, so this week is what I like to call "the beginning of the end". We will be working for the Evangelical Covenant Church, and this is the week we start interviewing with the Superintendents of each conference in the country.Our theme for this year is "No Expectations" (I don't know how many times I've said that to myself and others these past two weeks...lots!) so of course...we are not expecting to stay here in our beloved Chicago, or even the midwest (scary!!).So if you make this soup, and while you're eating it and thinking about how great you think this blog is and the joy this soup brought into your life (hehe too much?) think of us, send us your good thoughts and prayers.Also, my lovely husband got me an immersion blender. Yay. I think he was just sick of washing the blender and everywhere I dripped after making soup.

Carrot Ginger Soup

Weight Watchers Points+ 6 servings: 3 pointsadapted from Food Network & Maxine Bonneau

I swapped out heavy cream for evaporated milk to lighten up on the calories. Also, I love serving this dish with baked polenta cakes (the polenta in a tube just sliced and baked) and edemame.

2 tbs sweet cream butter (look for lite butter)1 large white or spanish onion peeled & rough chopped or 2 medium onions2 pounds carrots, peeled and sliced6 cups fat free/low sodium chicken or vegetable stock (if you want the recipe to be vegetarian)2 tbs grated ginger (or 1/4 tsp ground powder ginger)1 cup fat free evaporated milksalt and pepperSour CreamParsley for garnish

1. Heat butter in 6-quart pan (or I use my large Le Crueset french oven)2. Rough chop onions and add to butter (don't worry about chopping perfect...you're going to be pureeing this all in the end). I also like to throw about a teaspoon of salt on the onions to get them good and tasty.3. Peel your carrots and again, just roughly slice them into similar size pieces. Grate your ginger now too.4. When the onions have gotten limp or softened (I found with the spanish onion they just got soft and sweet and smelled like onion rings...yum) add the 6 cups of stock, sliced carrots, and the ginger. Stir together.5. Cover and bring to a boil.6. Lower the heat and simmer until the carrots are soft. Remove from heat.If you do not have an immersion blender, read 7. If you do own one, read 7.1 7. If you have a regular blender, carefully transfer soup to the blender only filling it up half way. Take the little cap out of the lid to vent and put a towel over the hole so you don't have an orange kitchen. Blend away my friend. Repeat in batches if necessary.7.1 If you have an immersion blender, CAREFULLY blend until soup is pureed and smooth. Try not to splash yourself with this molten hot concoction like I did. Ouchie.8. Add 1 cup evaporated milk so it's nice and creamy.9. Season with pepper if you'd like, and 2 tsp+ kosher salt.I really like to put a dab of sour cream in my bowl and pour the soup over, remember to add in the additional points.

back and better than ever!

it's 2011 it's 2011 it's 2011!!!!!!!!!!!! i want to scream it from the roof tops! this year has seemed so far off in my mind for so long, and it's finally here, and for some weird reason it feels so good.one of our new resolutions was to majorly cut back on our eating out expense. Hence, the restart of my food blog...with a twist. I am currently on the Weight Watchers program, so no more Julia Child butter fests or quarts of heavy cream. Hopefully I'll be able to post my recipes and my results.Now for the eating out bit: we haven't eaten out since December 30th, 2009 and it was at one of our favorite restaurants. Boy...we did ourselves in. Then of course we had to top the end of the year off with fried wings (they had buffalo wild wings sauce on them!!!), homemade french onion dip, and an assortment of cocktails and my favorite Chicago's own Goose Island Matilda....with fun friends and a nice round of Wits and Wagers before midnight. Ya. Total that all up to a nice 8 pound weight gain (don't forget to add in all the caramel, truffles, and toffee I made as gifts aka snacked on while making for Christmas).My experience so far this year (5 days in!) has consisted of Garlicky White Bean dip, Potato Leek soup, Mushroom Parmesian Crostini's, General Tso's chicken, and more. Tonight was Taco Wednesday, but unfortunatly Andrew had to work last minute, so the fiesta has just been for uno, me plus my Ina Garten cookbook I just picked up from the library.Tacos I made were pretty standard....hard shell, grassfed ground beef, topped with the food equivalent of GOLD (corn salsa from Trader Joes...run don't walk to one right now and purchase).But my new go to sweet treat is Black Bean Brownies. Now, I used a regular size cake pan, so they are really thick this time = more points+ used. But usually I use the biggest size pyrex I have and they are about 2-3 points+.Get ready here is the recipe. Lots of ingredients.

Dark Chocolate Black Bean Brownies

Weight Watchers Points+ in a 9x13 cake pan: 5 points

What you get is really nice cakey but still fudgey brownies with no fat or oil added. Try mixing in some espresso powder or a Starbucks Via for a flavor enhancer!

1 family size box Dark Chocolate Brownie Mix1 can black beans

1. Heat oven to 350 degrees.2. Puree black beans in a food processor until smooth (dump the whole can in there...do not drain!)3. Combine dry mix and beans in a kitchenaid or by hand until smooth.4. Spray pan with cooking spray (I used 9x13).5. Put mixture in pan.6. Bake for 35 minutes, checking at 30mins to see if they're done depending on your oven.

Chicago, food, Recipes Comment
Fro-YO!

Today is apparently the first day of summer here in Chicago. We were in Kansas City over the weekend, so we were thrilled to be getting back up north to cooler weather. Not so :)To celebrate summer finally showing up, we had turkey burgers and decided to make frozen yogurt. In my month long sabbatical from blogging, I made a delicious purchase of a Cuisinart ice cream maker.So far I've only made vanilla ice cream and watermelon sorbet. On deck is chocolate sorbet and chocolate fro yo.Today we went with plain frozen yogurt so we could top it with fruit, chocolate chips, anything!I have included the recipe for plain and vanilla.

Better-than-Berry-Chill Frozen Yogurt by Alicia Sturdy

Prep Time: 5 minutes+1 hour chill timeIngredients

3 cups plain yogurt (use whole yogurt or any kind of Greek yogurt like Fage 0% or 2%)2/3 cup sugar or agave(for vanilla: use one vanilla bean)

Instructions

Combine sugar and yogurt. Wisk until sugar is dissolved.Add vanilla if using. Wisk until combined.Refrigerate one hour to chillPrep ice cream maker and immediately pour chilled ingredients in spout while machine is running. Freeze according yo manufactures instructions.My machine is to churn 30 minutes and freeze two hours.Enjoy delicious healthy fro yo that doesn't cost a fortune!!

Recipes Comment
a knead for bread

Well I am almost finished up with The Art of Eating In and am almost over with a busy few weeks. I have been traveling so much, and our weeks have been jam packed. Andrew is almost done with school for this semester, and then he starts coming to work at my lovely place of employment.I was really intrigued by this No-Knead bread recipe, especially since I don't have a bread machine, and we have been spending so much money on a loaf of french bread here and there. I decided to try to give it a crack. It's very simple.Mix the ingredients and let it sit 12-18 hours.Leaving the bread for the evening. Good night!It looks like this when it's ready to go!Flour a work surface, and fold the dough over itself a few times. Place on a floured cotton towel (not terry cloth) and place another cotton towel over it. Let rise for 2 hours or until it's bigger.Place into a cast-iron pot or pyrex pan and bake at 450 for 25 minutes. and VOILA.Tasty, crispy, soft on the inside bread.

No Knead Bread Recipe

Ingredients

3 cups flour (I used bread flour)1/4 tsp Dry Active Yeast1 1/4 tsp salt1 5/8 cup of water (2tbs=1/8 cup, so 10 tbs+1cup water)Mix the ingredients until well blended. Let sit 12-18 hours covered in the bowl with plastic wrap. The dough will be ready when little bubbles form on the top.Flour your work surface and "Fold" the bread over itself (basically after I got it out of the bowl, I just folded the ball in half...you can be fancy and fold both ends in on each other in a "tri-fold" type way).Flour (more generously than before...but don't over do it) a cotton towel and place the bread with the "seam" side down (where the fold is...you'll be able to tell there will be a defined line) on the floured towel. Cover with another cotton towel and let rise 2 hours. You should be able to poke it and it not bounce back very quickly when it's ready.In the mean time, heat the oven to 450 degrees. Place your cast iron pot into the oven to warm it up as the oven heats. When the dough is ready, place your hand under the towel and carefully plop the dough seam-side up into the pot. It will be messy with the flour everywhere but that's okay. Shake the pot back and forth to even out the bread if needed.Place the cover on the pot and bake for 35-40 minutes, then take the cover off and bake for an additional 10-15 or until crust is golden.Cool on a wire rack and enjoy!Hopefully I will be making a couple more variations of this bread as my creativity and ingredients allow! I'm looking do to a cinnamon bread next..my favorite!

Spring is here!

This is a pretty early morning post for me. But I can't help but want to write about my great day yesterday. Andrew and I have been through a very busy past 6 months, culminating with a bunch of really intense past couple of weeks. With summer closing in on my calendar, I feel the need for all the spring time essentials including spring cleaning.Yesterday I took a personal day to clean out my soul and our kitchen. We had dishes from many meals ago ghat had been ignored so it was time to tackle that.To close my day I had dinner with Baking Baileys in an effort to clean out both of our fridges since we will be evacuating Chicago to celebrate Easter.I found this BBQ recipe to go along with out sweet potato fries to try to pull together our random dinner. I am not one of those die hard "just the right taste" BBQ sauce people, so this was my first attempt At making a condiment that on the contrary my husband is obsessed with.I'm sure if you wanted more kick than Zing, you could add some Hot sauce to it. Again I'm not a BBQ connoisseur so please feel free to suggest some tasty additions!

Balsamic BBQ Sauce by Giada De Laurentiis from the book Giada's Kitchen

Ingredients

  • 1 cup balsamic vinegar

  • 3/4 cup ketchup

  • 1/3 cup brown sugar

  • 1 garlic clove, minced

  • 1 tablespoon Worcestershire sauce

  • 1 tablespoon Dijon mustard

  • 1/2 teaspoon salt

  • 1/2 teaspoon freshly ground black pepper

  • 4 chicken breasts, grilled and seasoned with salt and pepper

Combine all the ingredients in a small saucepan and stir until all the ingredients are incorporated and the mixture is smooth. Simmer over medium heat until reduced by 1/3, about 15 to 20 minutes.Lightly coat the chicken with some of the BBQ sauce using a pastry brush while still on the grill or in the pan. Place the remaining BBQ sauce, still in the small saucepan, over low heat or on the edge of a gas or charcoal grill and allow to gently simmer while the meat cooks.

real simple

ok friends, sorry I have been absent for so long. We have been busy busy busy and along with that, cooking MANY dinners from so many great recipes I have been storing up to blog about.We have been watching a lot of Hulu and making trips to the library in our little free time. More specifically, we have been watching a lot of "food tv". Kitchen Nightmares, Jamie Olivers Food Revolution, I'm reading a slurry of cookbooks from the library, and just recently convinced Andrew to let me purchase my "must have book of 2010."I am reading this new book, "The Art of Eating In"...not sure if it's new to the world, but it's new to me. Oh my lord, Cathy Erway: you are my kindred spirit. I chuckle, I gasp, I nod along as I read your book. I feel like we are friends, having a conversation about your new venture. But every page I pass, I am affirmed in my convictions that while eating out is a treat in so many ways...cooking brings me so much more joy than having someone serve me. My mind has been afire with thoughts of where my food comes from, who made it, whats in it, how does it get to be what it is...and they weave there way in and out and inbetween my daily doings as I think and prepare for that evenings meal. My hands are quickly chopping the onions. I'm cooking the meat with the precise amounts of spices, salt, butter, fat...so I know what is going in to the food and on to my plate. I feel inspired by Cathy...so be prepared to hear my rambles of questions & thoughts as I dig more into her book and blog.That's how I got at this recipe. The ingredients aren't special, I didn't buy them at a food emporium or a specialty shop. This recipe just simply holds memories for me. The taste brings me back to the times I've prepared it...usually for my husband. Times we've shared it with others come back to my mind, and it reminds me that good food doesn't need to be made of a million little specialty ingredients, machines, techniques. Well...not all of the time.Andrew requested this dish the other day when I asked him what he'd like for dinner. After picking up my new Le Cruseut french oven (!!) (another great craigslist find), we headed to the store to pick up what was needed. I think the one thing I love about this beef stroganoff compared to others, is that the vegetables stay kind of crunchy after cooking them, so it's almost refreshing.Also, this dish can be doubled easily for entertaining, and doesn't need much "tending to" so you can cook it easily and serve quickly!

Beef Stroganoff by Real Simple's Kate Merker, December 2006Serves 4

Ingredients

  • 1 12-ounce package egg noodles
  • 1 tablespoon olive oil
  • 1 small yellow onion, thinly sliced
  • 1/2 teaspoon kosher salt
  • 1 4- to 4.5-ounce can or jar sliced mushrooms, drained **if you substitute fresh, it will have more crunch and texture.
  • 1 green bell pepper, thinly sliced (optional) **do not make this optional..it makes the dish so unique and tasty!
  • 2 10-ounce packages fully cooked beef strips **if you are in a pinch..sure-go for this...I bought beef and cooked it in 1 tbs butter and it is much less chewy than this packaged beef. Plus...you made it!
  • 1 8-ounce container light sour cream
  • 2 1/2 tablespoons steak sauce
  1. If using raw meat, slice thinly (or purchase "stroganoff beef") and slice into thin strips. Melt 1 tbs butter in a pan, and cook meet accordingly...about 2 minutes per side depending on the thickness of the cut (mine were pretty thin, so it didn't take much time).
  2. Cook the noodles according to the package directions. Meanwhile, in a large saucepan, over medium heat, heat the oil. Add the onion and salt and cook for 5 minutes. Add the mushrooms and bell pepper (if using) and cook for 5 minutes. Add the beef and cook until warmed through, about 8 minutes.
  3. In a small bowl, combine the sour cream and steak sauce and stir the mixture into the beef and mushrooms. Divide the drained noodles among individual plates and top with the stroganoff

my favorite treat from the market...Mexican Cola...yummmm.
bippity boppity bacon

So after a long weekend of tramping around town with mom+little sis, 1 chicago style hotdog, a trip to Rosebud (where I got the inspiration for this recipe), the Art Institute and many delicious breakfasts later: I'm back, Wustof in hand, Canon Rebel back in biz to document my fun. I do have to admit though, I love the iPhone pictures, but we'll see how this goes.As I said before, my mom and sister where in town this past weekend for their spring break. On Saturday night, we went from restaurant to restaurant, trying to get a quick table for dinner sans reservations. Finally after walking in circles around River North, we ended up at the doorstep of Rosebud. After shopping and going to museums all afternoon, we were ready for a meal: and boy did we get a treat! I ordered the Fettuccine Boscaiola, which is Mushrooms, Spinach, Garlic in a White Sauce with Toasted Breadcrumbs and White Truffle Oil.  Each bite was divine.  The mushrooms where cooked perfectly to my taste (I like a little bit of cooked crunch...nothing limp when it comes to mushrooms, that's boring!), and the breadcrumbs where a perfect surprise on top. We also had a traditional Spaghetti, and topped our meal off with a giant slice of the Canolli cake. We waddled our way back to the hotel room, and promised that this would be our new dinner place in town.So since I was so inspired, I can't seem to get away from Martha lately, I had to try this. Plus my favorite part is I had all these things in my pantry which makes it all the better. This dish is a carbonara like pasta, quick, easy, ready in 25 minutes.  I opted for turkey bacon instead of pancetta: although next time I may use a high quality bacon. Turkey bacon doesn't give you those delicious crumblies...it was more like bacon chips. I also used about a 1/2 tbs of black truffle oil to give it a little bit of a flourishing aroma and taste.

Fresh Linguine Pasta with Bacon and Peas by Martha Stewart

Ingredients

Serves 4 to 6

  • Coarse salt and ground pepper
  • 4 slices turkey bacon, sliced crosswise into 1/2-inch pieces
  • 2 shallots, halved and thinly sliced OR 1 medium onion+2cloves minced garlic
  • 1 box (10 ounces) frozen peas, thawed
  • 1/3 cup heavy whipping cream or half and half
  • 2/3 cup chicken broth
  • 18 ounces fresh linguine pasta or any type of fresh cut pasta

Directions

  1. Set a large pot of salted water to boil. In a large skillet, cook bacon over medium until crisp, 5 to 7 minutes. With a slotted spoon, transfer to a paper-towel-lined plate to drain (leave fat in skillet).
  2. Add shallots/onions+garlic to skillet; season with salt and pepper. Cook over medium, stirring occasionally, until they begin to soften, 1 to 2 minutes.
  3. Reserve 2/3 cup of pasta water to make chicken broth (if using a boullion cube**).
  4. Add peas, chicken broth and whipping cream; season with salt and pepper. Simmer until slightly thickened, about 2 minutes.
  5. While simmering, drizzle oil over mixture. Toss while continuing to simmer.
  6. Cook pasta in boiling water until al dente, according to package instructions. Reserve 2/3 cup pasta water**; drain pasta, and return to pot. Pour sauce over pasta; toss to combine. Sprinkle with bacon, and serve

**I used a bullion cube instead of canned/boxed chicken broth because that's what I had in my cupboard. I made the broth using the water from the pasta so it was more starchy and able to thicken a little better with the peas and onions.  If you don't use a bouillon cube, just reserve 1/4 cup of the pasta water and slowly add while tossing with sauce.

lemony goodness

Since we got a KitchenAid for Christmas this year (Thanks Auntie Teri!!) I have been way more motivated to bake. The work is already done for me when whipping egg whites, making frosting, and especially when making the angel food cake batter and frosting for this recipe.I get the Martha Stewart Everyday Food emails well...everyday. And yesterday as I was cruising the website I noticed Martha had a whole feature on lemons.I came across an angel food cake recipe that looked so beautiful and delicious in the picture. I love angel food cake: it's light, fluffy, melts in your mouth. Tasty. Of course I've only ever made the boxed ones, so here was my hand at trying to make my first angel food cake.Now, let me tell you about my angel food adventure. Martha says..." Transfer batter to a 10-inch angel food cake pan with legs."Translation in my mind: Isn't a tube pan a less fancy bundt pan?So I begin my adventure after work to find a cheap tube pan. Surely any thrift store in the Chicagoland area with a pretty wide variety of kitchenware should have at least ONE.I went to 3 different thrift stores. Of course everyone has a plethora of bundt pans to donate to the Salvation Army...probably because they once tried to make an angelfood cake that stuck to it and thought "What is the point of owning this."After 90 minutes of driving to my favorite thrift stores: nada. I finally drag myself to Target before Andrew needs the car to go to a meeting: they have ONE tube pan. PRAISE the Lord.Whats the point of jabbering on about bundt pans vs. tube variety?The cake will simply not come out of your fancy schmanzy bundt pan.Oh, and the cake was a tasty snack today at work!Also in other news, my new memory card came! My C. Rebel is back in business!Onward to the recipe!

Lemony Angel Food Cake recipe by Martha Stewart

Ingredients

Makes one 10-inch cake; Serves 10 to 12for the cake

  • 1 cup sifted cake flour (not self-rising)
  • 1 1/2 cups sugar
  • 12 large egg whites
  • 2 tablespoons finely grated lemon zest
  • 1 tablespoon plus 1 teaspoon fresh lemon juice
  • 1 teaspoon cream of tartar
  • 1 teaspoon pure vanilla extract
  • 1/4 teaspoon salt

for the lemon cream 'frosting'

  • 1/2 cup fresh lemon juice (if you don't want it really lemony, you could use refrigerated lemons since their taste isn't as forceful as freshly squeezed..but don't you want fresh!?)
  • 1/2 cup sugar
  • 1 tablespoon cake flour (not self-rising)
  • 1/4 teaspoon salt
  • 1 1/2 cups heavy cream, chilled
  • 1 tablespoon finely grated lemon zest

Directions

  1. Make the cake: Preheat oven to 325 degrees, with rack in lower third of oven. Sift flour and 1/2 cup sugar into a bowl.
  2. Whisk whites with a mixer on medium speed until frothy, about 1 minute. Add lemon zest and juice, cream of tartar, vanilla, and salt; continue whisking until soft peaks form, about 2 1/2 minutes. With mixer running, gradually add remaining cup sugar.
  3. Increase speed to medium-high; continue whisking until firm, not stiff, peaks form, about 2 minutes. Sprinkle whites with 1/3 of the flour-sugar mixture. Using a rubber spatula, gently fold to combine. Sprinkle remaining flour-sugar mixture over whites in 2 additions; gently fold to combine.
  4. Transfer batter to a 10-inch angel food cake pan with legs. Gently run a knife through the center of the batter to remove any air bubbles. Bake until a tester inserted into center comes out clean, 45 to 50 minutes.
  5. Remove pan from oven, and invert onto its cooling legs (if your tube pan doesn't have legs, invert it over the neck of a wine, or similarly shaped, bottle to cool)**; let cool, 1 1/2 to 2 hours. Run a knife around the inner and outer edges of cake to remove. Invert onto a serving platter. (Use a knife to separate cake from bottom of pan.) Let cool on a wire rack. Unfrosted cake can be stored in an airtight container for up to 2 days.
  6. Make the lemon cream: Prepare an ice-water bath. Whisk lemon juice, sugar, flour, and salt in a small saucepan over medium-high heat. Bring to a boil; whisk constantly for 1 minute, until it thickens. Transfer to a heatproof bowl set in ice-water bath to cool completely, stirring occasionally. Meanwhile, whisk cream and lemon zest with a mixer on medium speed until medium peaks form, about 3 minutes. Gently fold whipped cream into juice mixture in thirds. Refrigerate lemon cream, up to overnight.

**Turning the cake upside-down on a bottle of wine, or on it's legs is important: don't skip this. If the pan is resting right-side-up, gravity will do it's work and collapse the cake on top of itself.Don't worry: like I said before, the cake will not fall out of the pan if you have done everything right. Gravity will work in the right direction to keep the cake tall when resting on the bottle...just pop the middle hole through the bottleneck.