Cardamom Love Buns
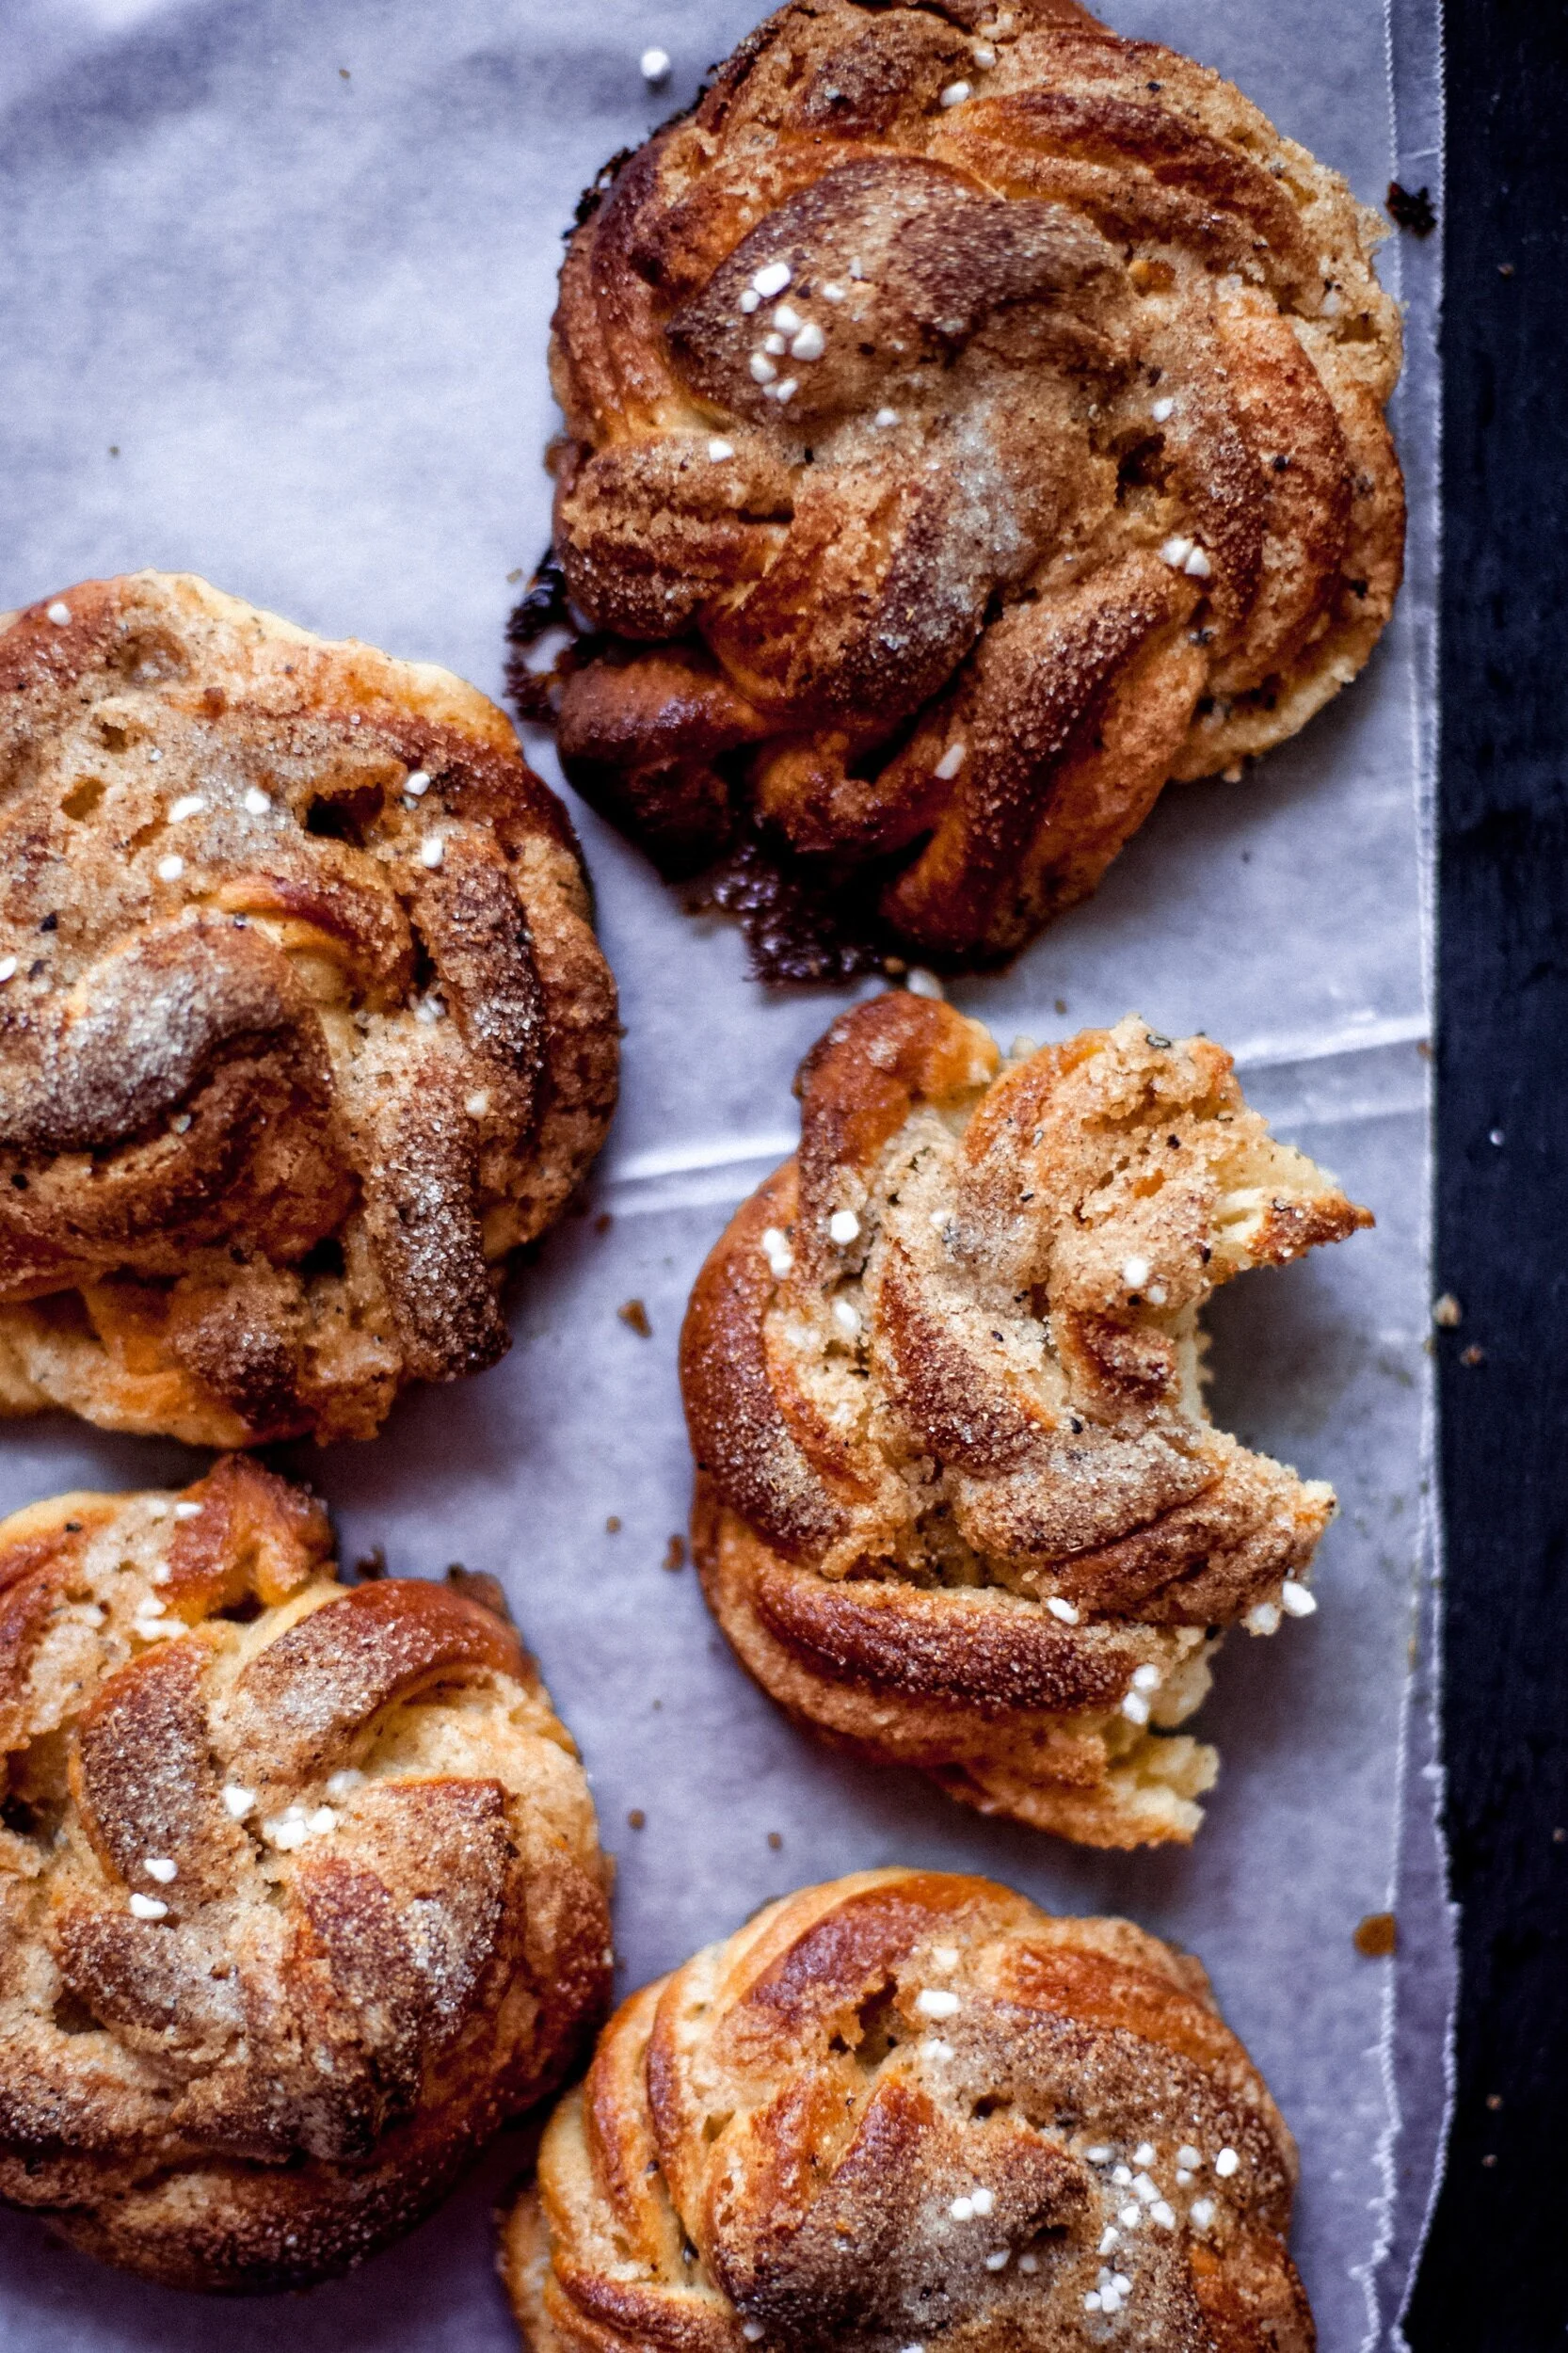

I’m going to be honest, I had only ever had one cardamom bun before I made them. After the labor of love (I’m an impatient person - rising dough can be a labor!), they came out of the oven and I couldn’t resist. Crunchy on the outside, soft and fluffy on the inside with flecks of cardamom seeds in the filling, I find these buns so satisfying. If you prefer cinnamon to cardamom, you can sub that in but I encourage you to give this Scandinavian spice a try.
Why are they called love buns? My niece is 18 months old - not an age where cardamom is easy on the pallet unless you’ve got Scandinavian blood. Well, she got a hold of a cardamom bun and had 3. THREE! I want to name this recipe in honor of her - because she loves them, because I love her, and her last name - Lovejoy.
INGREDIENTS
DOUGH
1 cup whole milk
1 tablespoon active dry yeast
1/4 cup warm water (110F)
1/2 cup sugar
1 teaspoon crushed cardamom seeds
1 teaspoon kosher salt
2 large eggs at room temp**
4.5 cups unbleached all purpose flour
1 stick (4 oz) unsalted butter, melted
FILLING
1 cup + 2 tbsp unsalted butter, room temp
1 cup sugar
1 tablespoon ground cardamom (powder)
1 tablespoon crushed cardamom seeds
1/4 teaspoon kosher salt
TOPPING
1 large egg
1 teaspoon cardamom seeds, crushed
2 teaspoons ground cardamom (powder)
3 tablespoons sugar
Making the Dough
1. Scald the milk in a small saucepan (milk scalds at 181F). Remove pan from heat and cool to anywhere between 105-115*F.
2. While the milk heats, add 1 tablespoon (YEP) dry active yeast to 1/4 cup warm water (about 110F) to your stand mixer bowl. It's ready to go (about 5 mins tops) when the yeast is dissolved and creamy.
3. Whisk the milk, sugar, cardamom (both types, if using), salt, and eggs into the yeast mixture. Put the bowl on stand mixer with the dough hook attachment and add 2 cups of the flour until smooth. Pour in melted butter, and turn the mixer back on until the butter is incorporated. Add in remaining flour, 1/2 cup at a time. Do this until the dough is pulling away from the sides of the bowl.
*If it's still a little sticky, flour your counter lightly and turn the dough out. Knead in up to another 1/2 cup of flour by hand until the dough feels silky and compact.
4. Line a sheet pan with parchment and loosely shape the dough into a flat rectangle. Slash the top lightly with a knife, 3 times about 1/4 inch deep. Cover dough with plastic wrap and place in the fridge to chill for 2 hours.
5. While the dough is in the fridge, make the filling. Using the paddle attachment of a stand mixer, cream the butter, salt, cardamom, and sugar (don't over mix). Set aside (don't refrigerate! you want this to be room temp).
6. Line two-13x18 baking sheets with parchment paper, and set aside.
7. Remove the dough from the fridge at the end of the two hours and let it sit out for a few minutes, so it's easier to roll out. Place dough on a lightly floured surface and roll out to about a 15x18 inch rectangle (about 1/8-inch thick). Lift the dough as you roll out to re-flour the underside of the dough, so it doesn't stick.
8. Divide up the creamed butter filling in little chunks across the whole dough and spread with a spatula or your clean hands across the whole surface of the dough.
9. Face the 15-inch side towards you (so the dough is running north/south from where you stand) and fold the top third over the middle third, and then fold the bottom third up over the middle as well like a letter.
10. Roll the dough vertically to flatten the edges - you can stretch it to size, about a 12x16 rectangle (this time the dough is facing east/west from where you stand). If any filling oozes out, wipe it away with a spatula to prevent a sticky surface.
11. Use a pizza cutter to cut the dough in half. Continue to cut the halves in half until you have 16 strips. Working with one strip at a time, cut it in half with the pizza cutter leaving the two strands connected at the top (about a 1/2 inch).
12. Twist the two strands over one another to form one twisted strand 'braid.' Coil the 'braid' in a circle and tuck the loose end under the bun. Place on your baking sheet and continue until all the strands are braided & coiled. Space the buns out evenly, and leave them to proof at room temp for about 1 hour. Then the dough should rise & become soft.
13. Preheat oven to 450 degrees (425 if you're using convection)
14. When the buns have proofed, make the topping. Whisk the egg together with 1 tablespoon water with a fork until combined.
15. Whisk the sugar and cardamom together until sandy looking. Lightly brush each bun with egg wash and sprinkle the sandy sugar on top (don't be shy, I recommend anywhere from 1/2 to 1 teaspoon per bun). For the finishing touch - sprinkle some Swedish Pearl Sugar on top, but if you can't find it, it's not necessary.
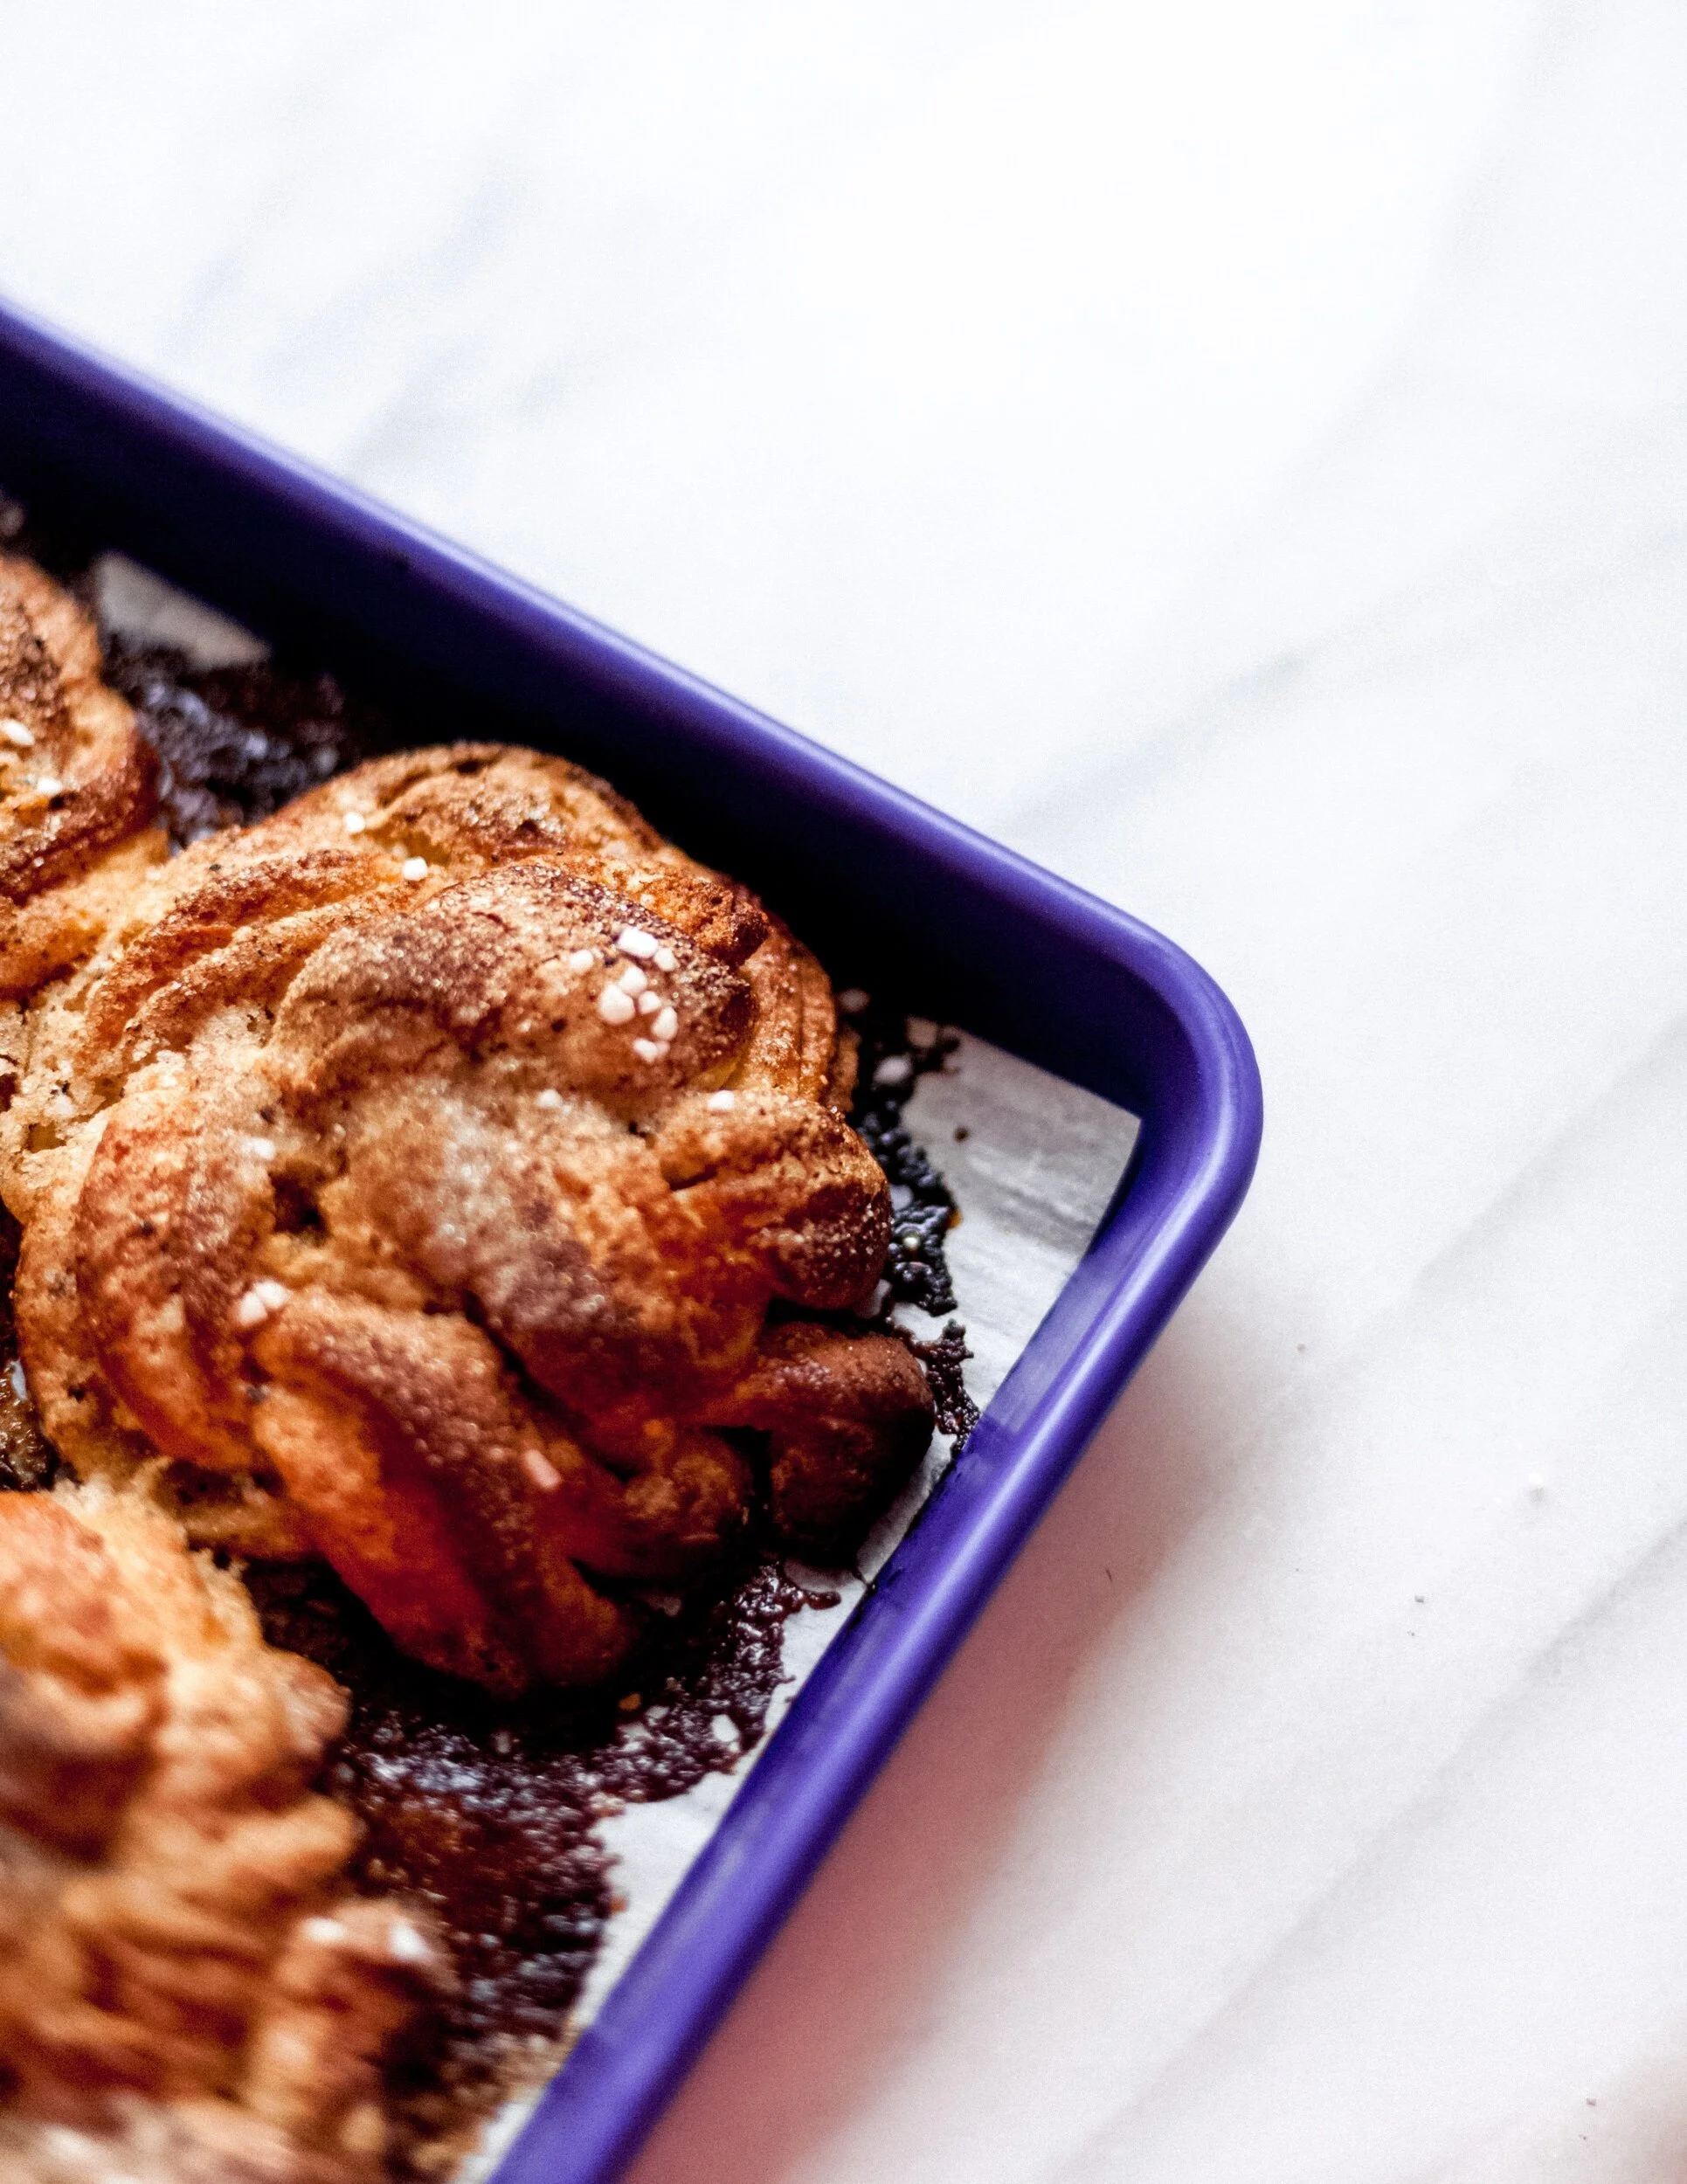
16. Bake for 8 minutes and then lower the temp to 375, rotating the trays (turn the tray 180 degrees and rotate the top and bottom trays to ensure even baking). Lower the temp ensures the buns bake all the way through, but the outside doesn't burn. Bake for an additional 12 minutes.
*(if you're worried about the buns burning, you can cover the trays with a piece of parchment paper towards the end once they've reached the golden brown color.
17. Let the buns cool for 10 minutes before eating, so the melted sugar has a chance to harden. Remove any lacy sugar around the outside before serving. Enjoy!